How to use Particle’s enhanced Location Service to locate a device without GPS


Ready to build your IoT product?
Create your Particle account and get access to:
- Discounted IoT devices
- Device management console
- Developer guides and resources
Introduction
Particle offers a number of devices with internal GPS modules, but what if that device doesn’t always have a reliable GPS fix? Location fusion was designed to “fill in the gaps” left by GPS connectivity. We can pass along the details of the currently connected cell tower in order to estimate a device’s location at any given moment. However, it’s worth noting that the theoretical worst case estimation is up to 10 kilometers, so don’t rely on this method for anything mission critical.
Device firmware
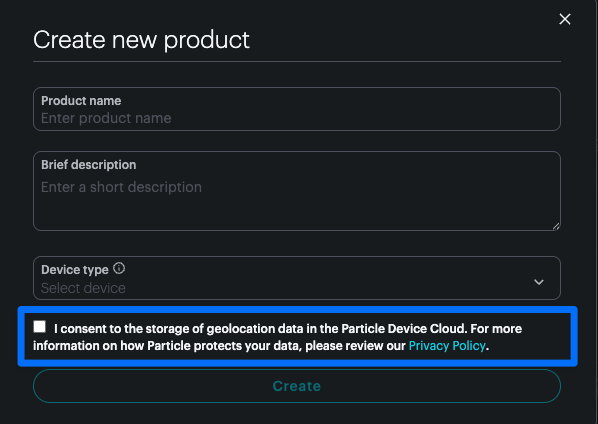
Onboard your device to the Particle ecosystem using the usual setup.particle.io flow. But, be sure to add the device into a product that has allowed the storage of geolocation data in the Particle Device Cloud.
center
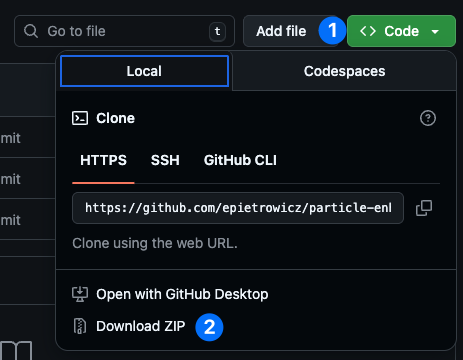
Then, download the code from the project’s repository and open the enhanced-location-firmware folder from the repository in VSCode. Make sure you have the Particle Workbench extension installed.
center
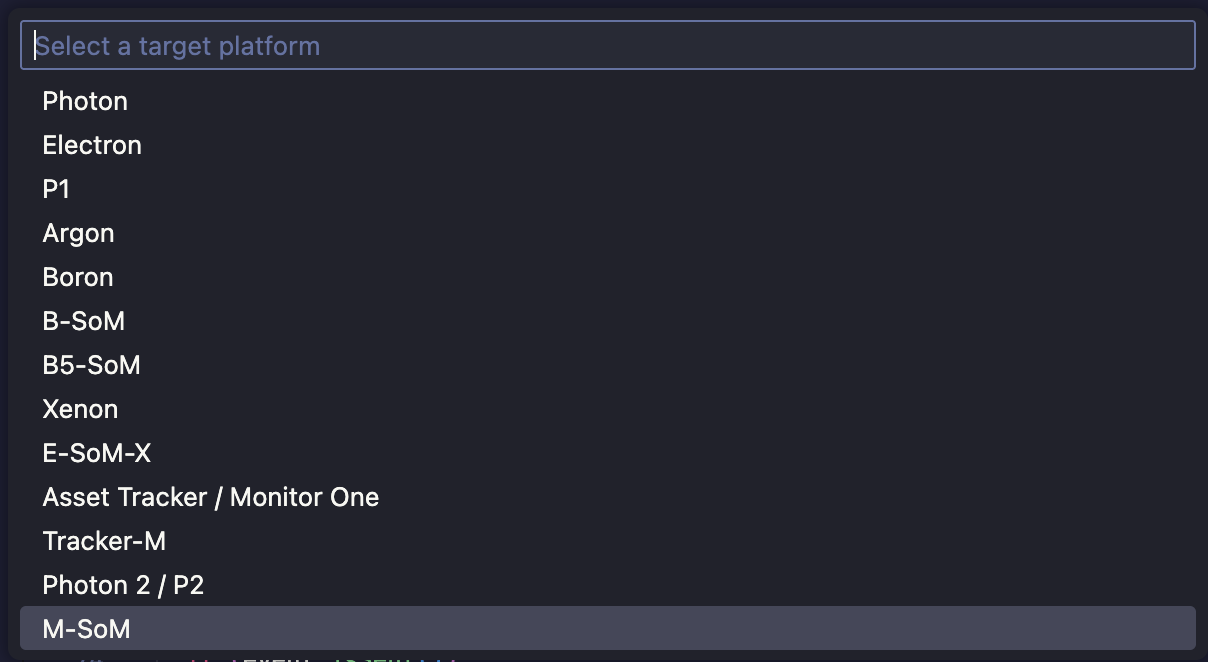
Configure the workspace for a Boron using Cmd + Shift + P (or Ctrl + Shift + P on Windows) and searching for > Particle: Configure Project for Device . Select your target platform (we’ll be using an M-SoM for this example) and Device OS version. Be sure the Device OS version you choose is 6.3.0 or above.

center
center

center
Now you can compile and flash the device using the > Particle: Flash application (local) command. It may take a few minutes for this to run the first time as the project will have to compile.

center
In the firmware, you can see that an array of nearby cell towers gets built out in towerInfo and is stored in a towers variant.
  QuectelTowerRK::TowerInfo towerInfo;
  Variant towers;
  int res = QuectelTowerRK::instance().scanBlocking(towerInfo);
  if (res != SYSTEM_ERROR_NONE)
  {
    Log.info("Failed to obtain CGI: res=%d", res);
    return;
  }
  towerInfo.log("towerInfo", LOG_LEVEL_INFO);
  towerInfo.toVariant(towers);
Then, the location payload is filled in using the towers array:
  Variant obj;
  obj.set("cmd", "loc");

  Variant loc;
  loc.set("lck", 0);
  loc.set("time", millis());
  obj.set("loc", loc);
  obj.set("towers", towers);
This gets published to the loc event stream and logged out to the serial port:
  event.name("loc");
  event.data(obj);
  Particle.publish(event);

  Log.info("publishing %s", obj.toJSON().c_str());

  // Wait while sending (blocking)
  waitForNot(event.isSending, 60000);

  if (event.isSent())
  {
    Log.info("publish succeeded");
    event.clear();
  }
  else if (!event.isOk())
  {
    Log.info("publish failed error=%d", event.error());
    event.clear();
  }
It’s important to note that the structure of the loc event is important. These key/value pairs are required by the location fusion service in order to generate a geolocation.
Once flashed, open the serial monitor using the > Particle: Serial Monitor command and monitor the output. You should see logs that indicate the device’s estimated location as well as information about your nearby towers.

center
0000007584 [app] INFO: publishing {"cmd":"loc","loc":{"lck":0,"time":7580},"towers":[...]}
0000007733 [app] INFO: publish succeeded
0000008198 [app] INFO: location enhanced event: loc-enhanced data: {"cmd":"loc","loc":{"lck":0,"time":7580,"lat":...,"lon":...,"h_acc":162},"v":2,"src":["cell"]}
Notice the loc-enhanced output. Back in the setup() function, we subscribed to the loc-enhanced event stream via the locEnhancedEventHandler callback function.
Each time a loc event gets published, the service that performs the geolocation will then emit a loc-enhanced event with the device’s coordinates. In the firmware we’re simply logging the payload:
void locEnhancedEventHandler(const char *name, const char *data)
{
  Log.info("location enhanced event: %s data: %s", name, data ? data : "NULL");
}
But, subscribing to this event stream in the firmware is completely optional because in the next section we’ll show how to use the Particle Cloud API to query the device’s location.
Location Cloud API
Now that we have our device reporting the nearby cell towers, we can query Particle’s Cloud API to fetch the device’s location. We’ll start by generating an API key with the correct permissions.
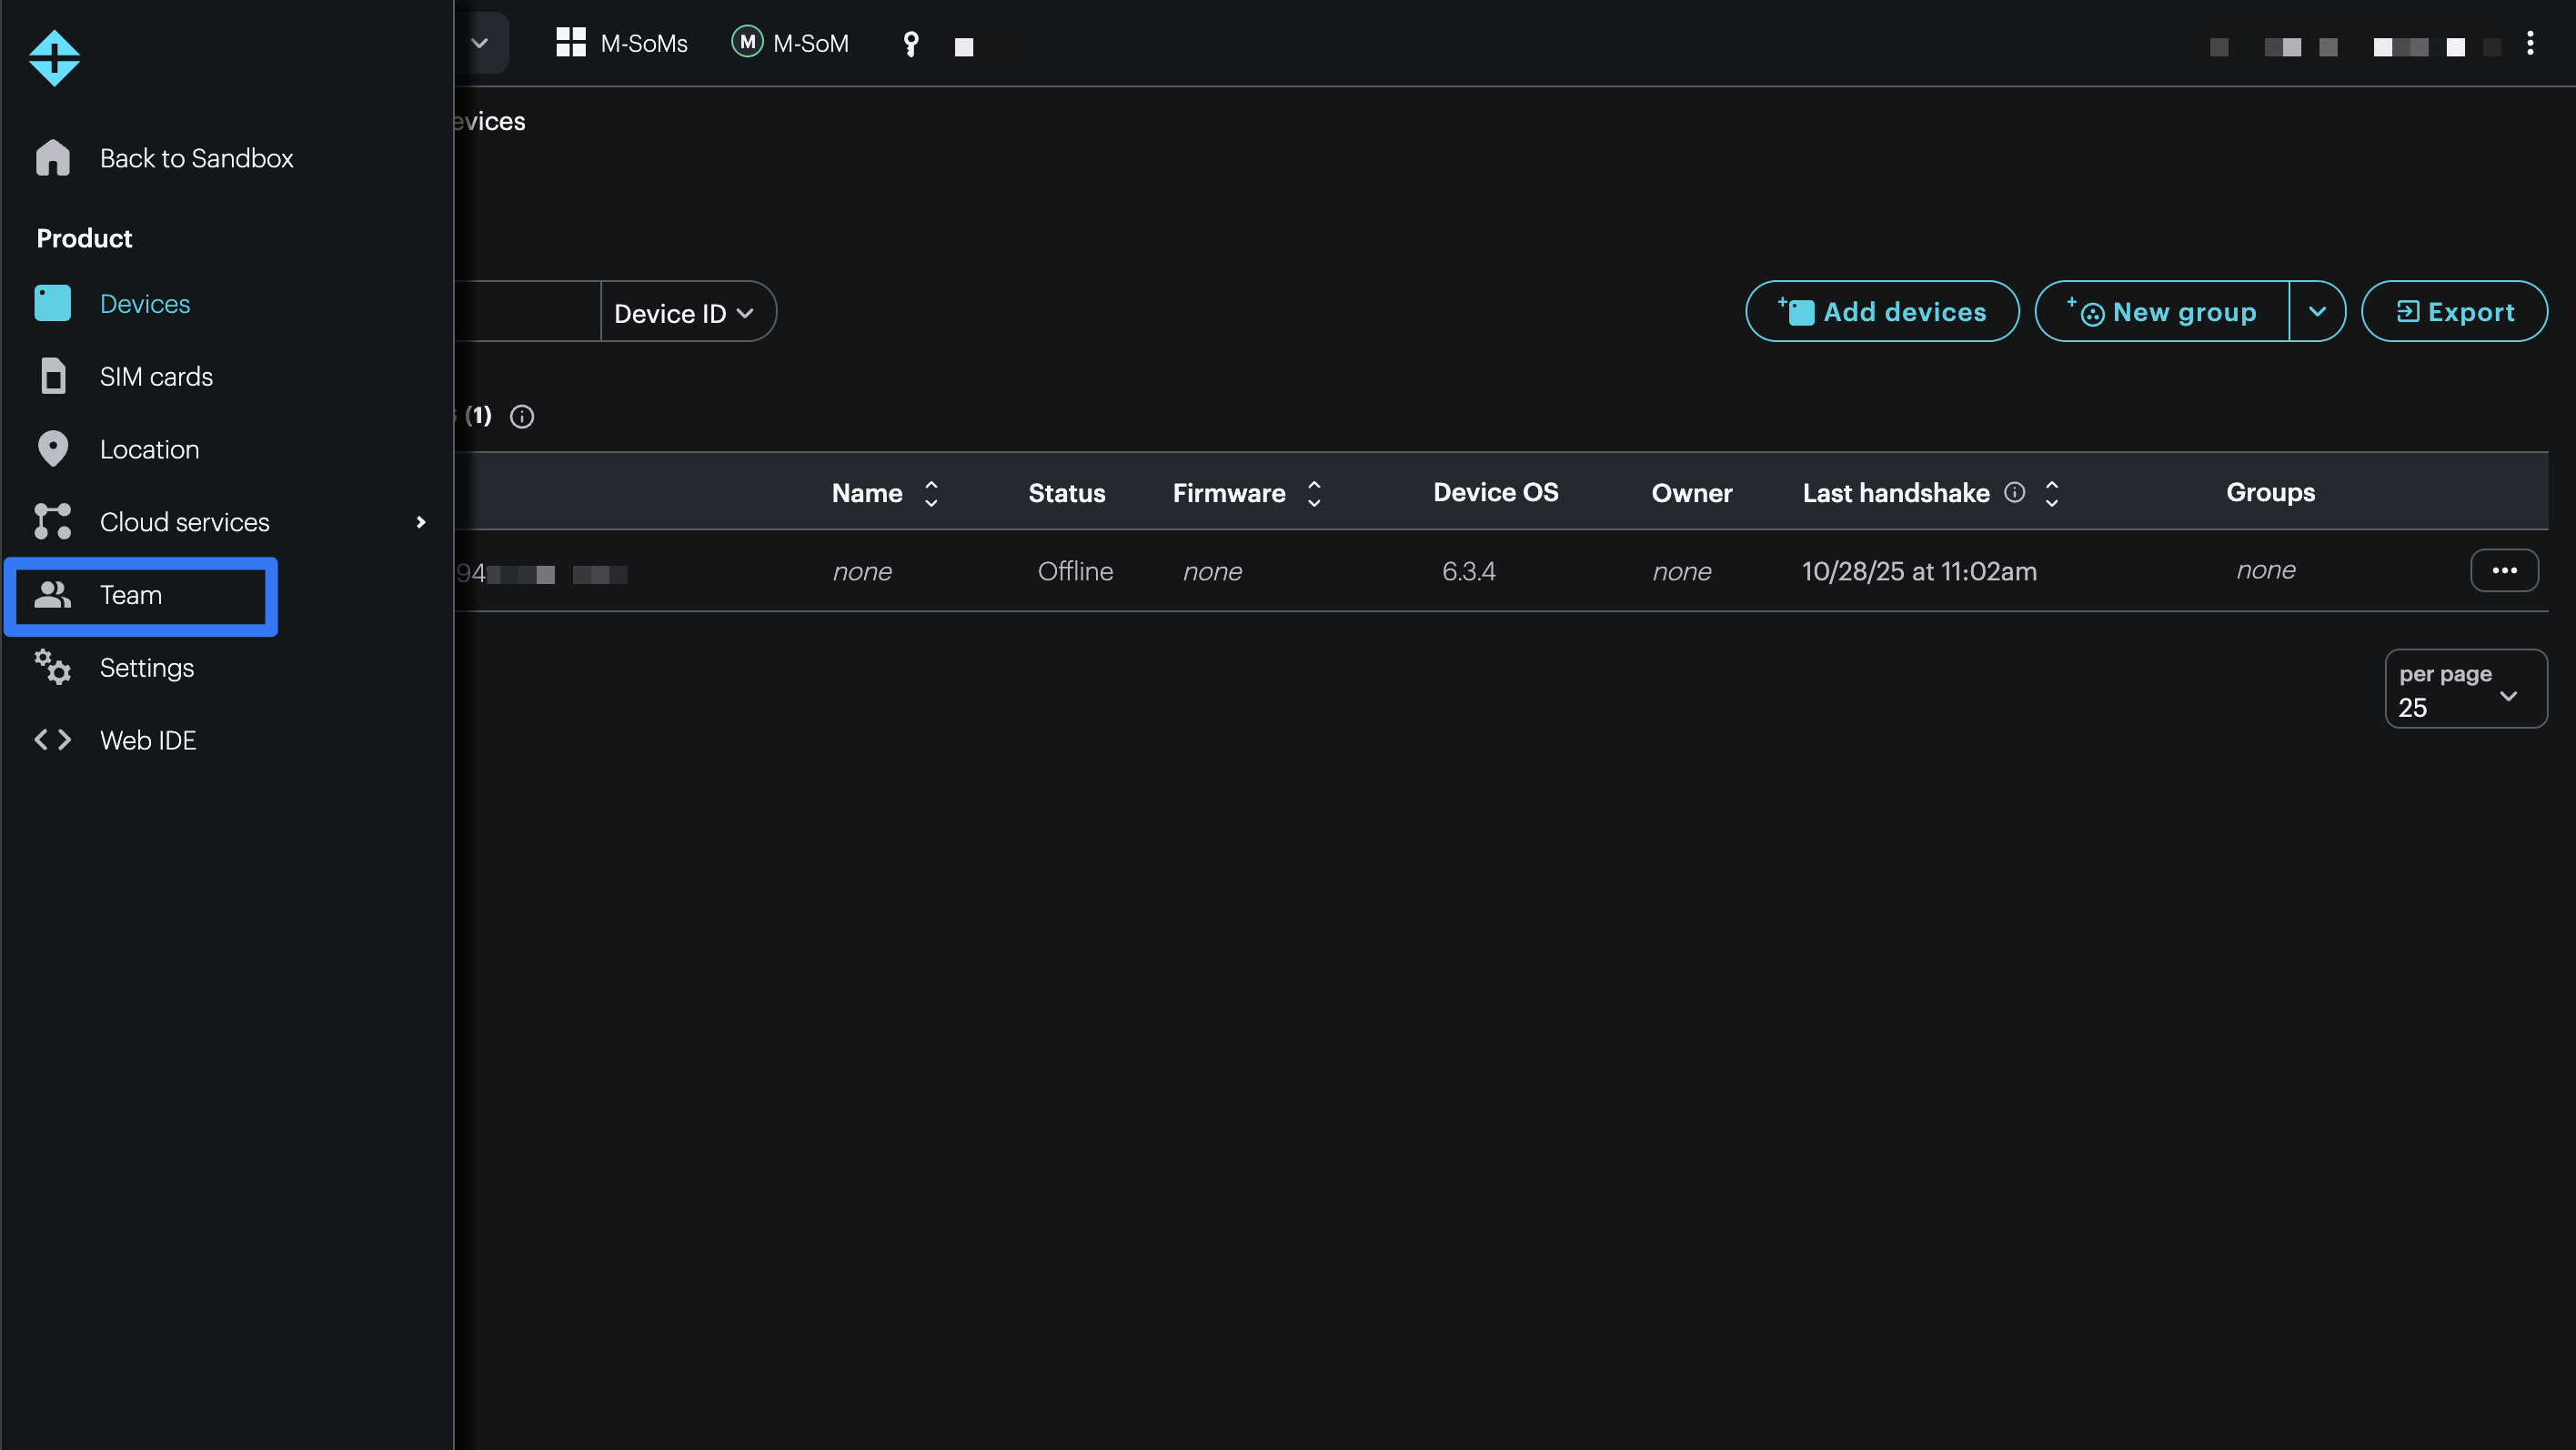
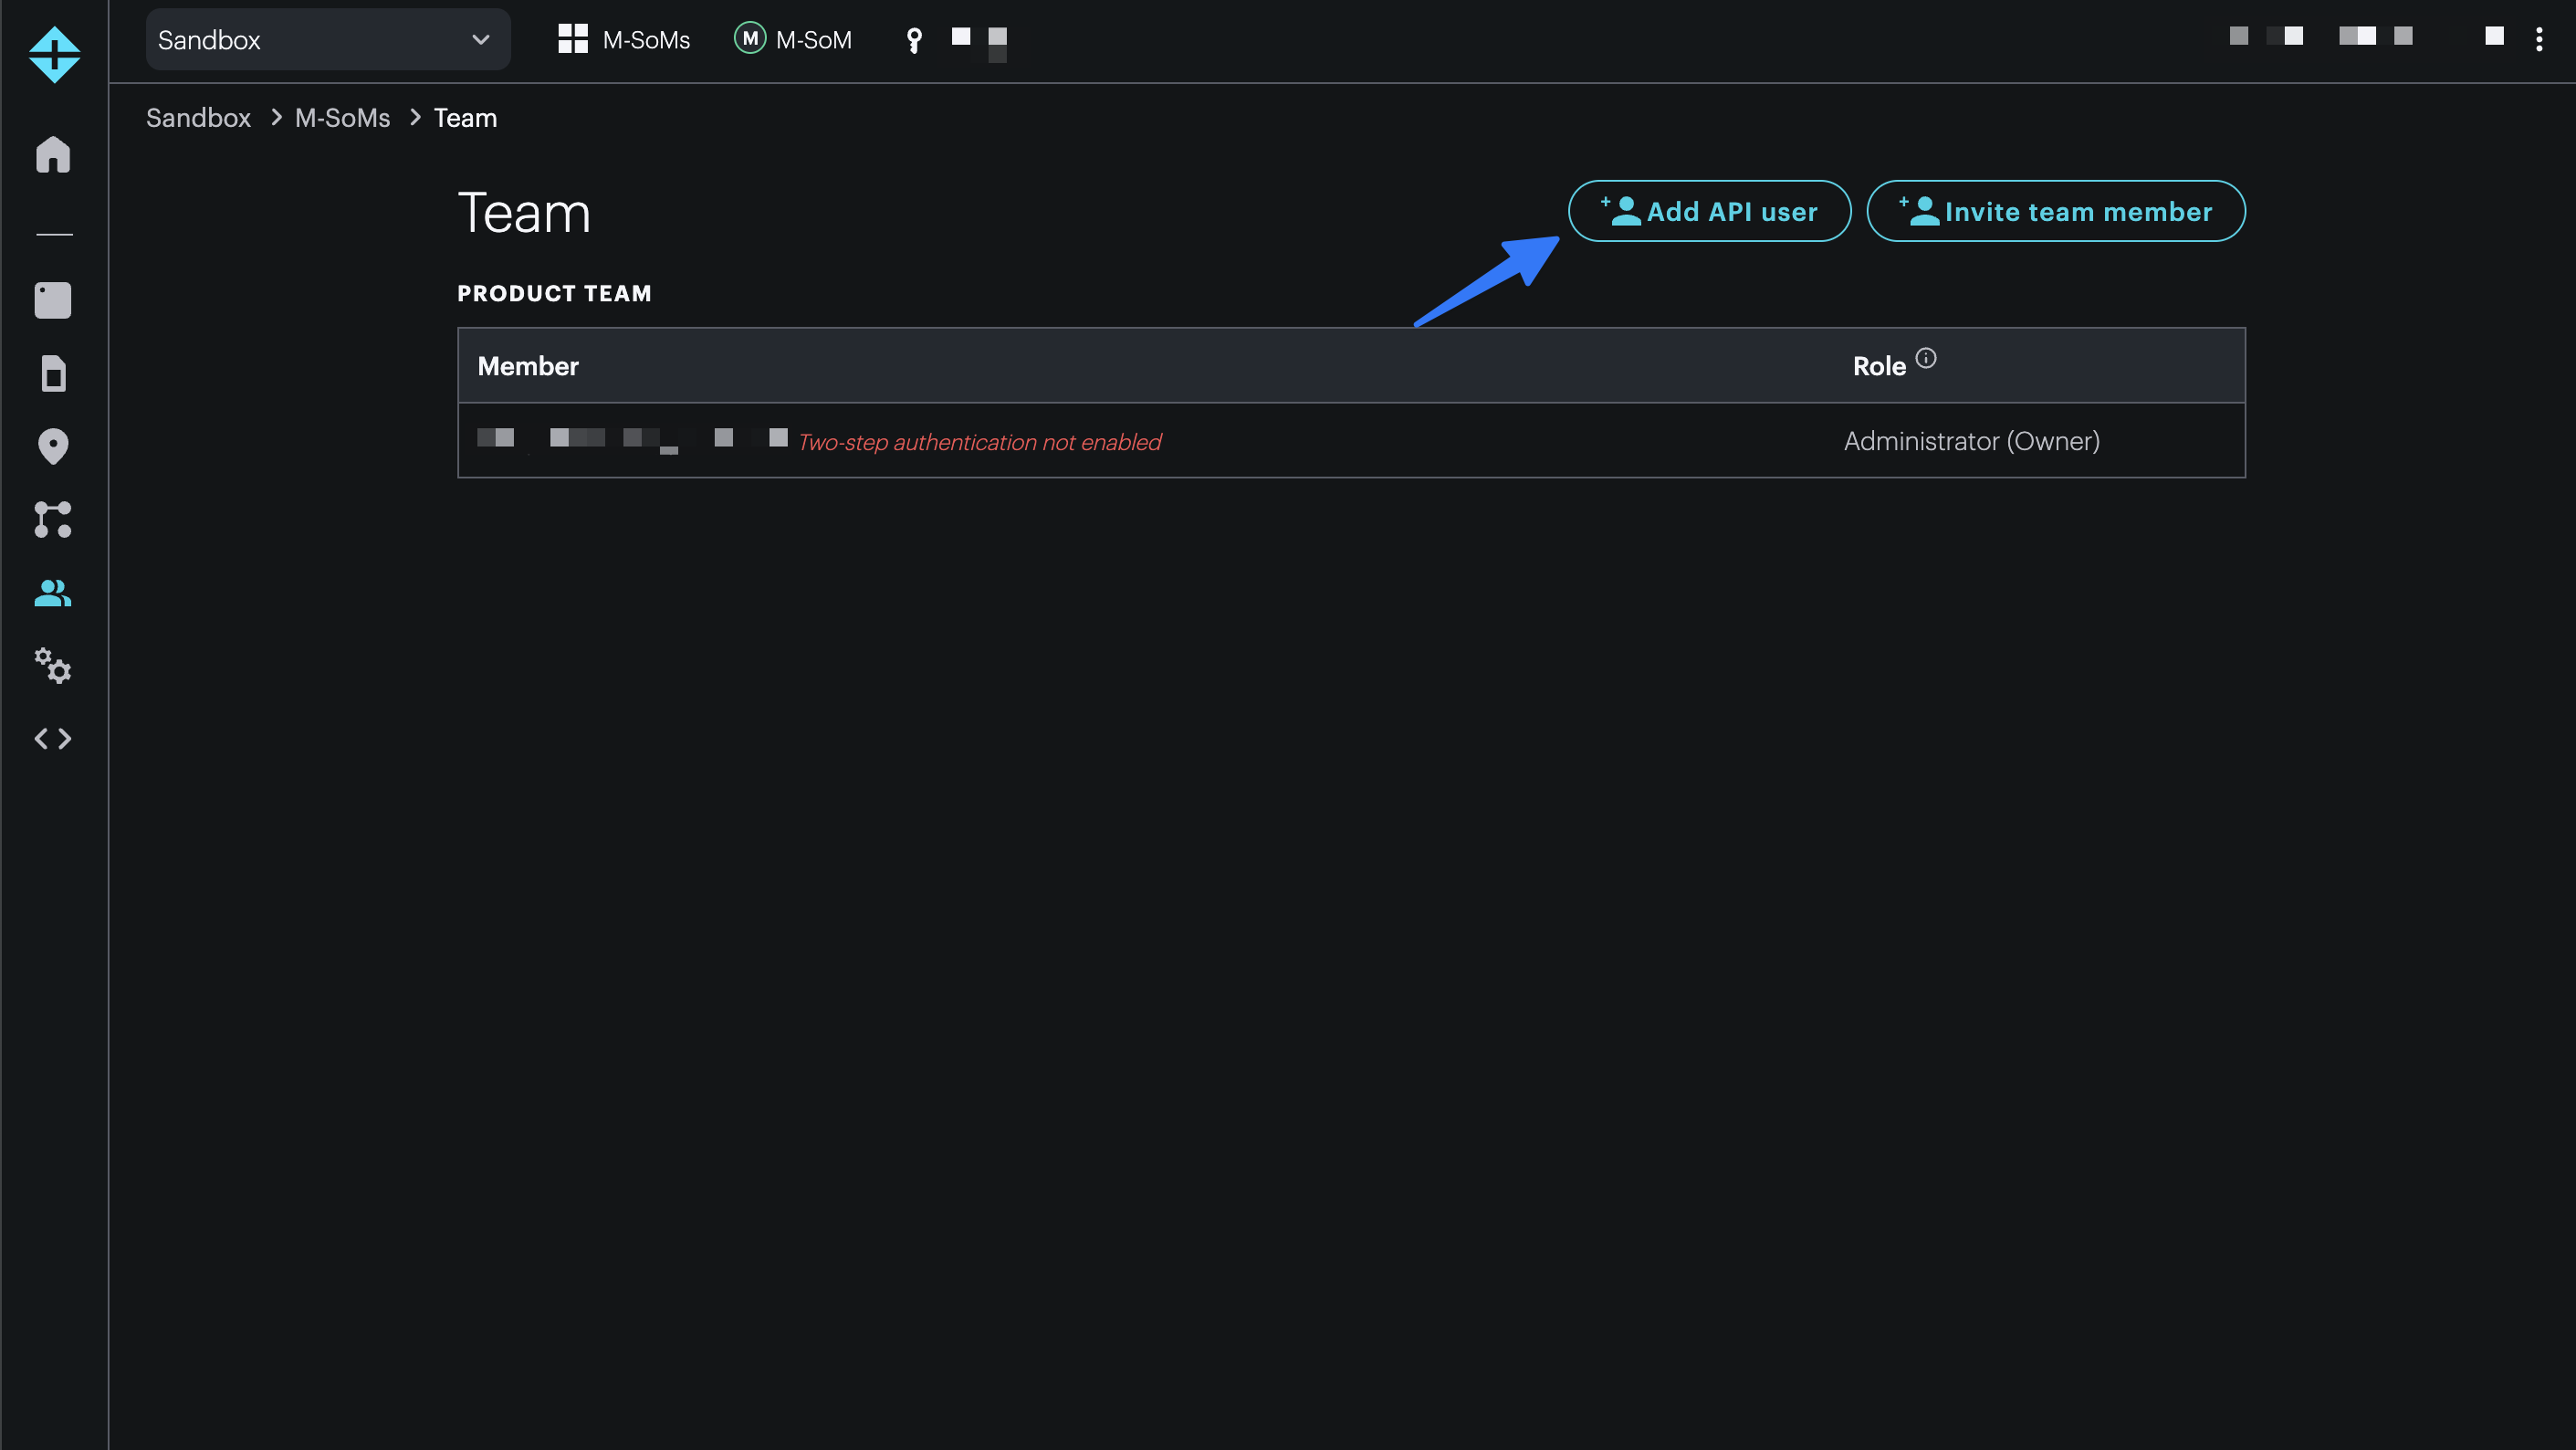
Do so by navigating to the device’s product page in the Particle console and select “Team” from the side panel.
center
Then choose “Add API user.”
center
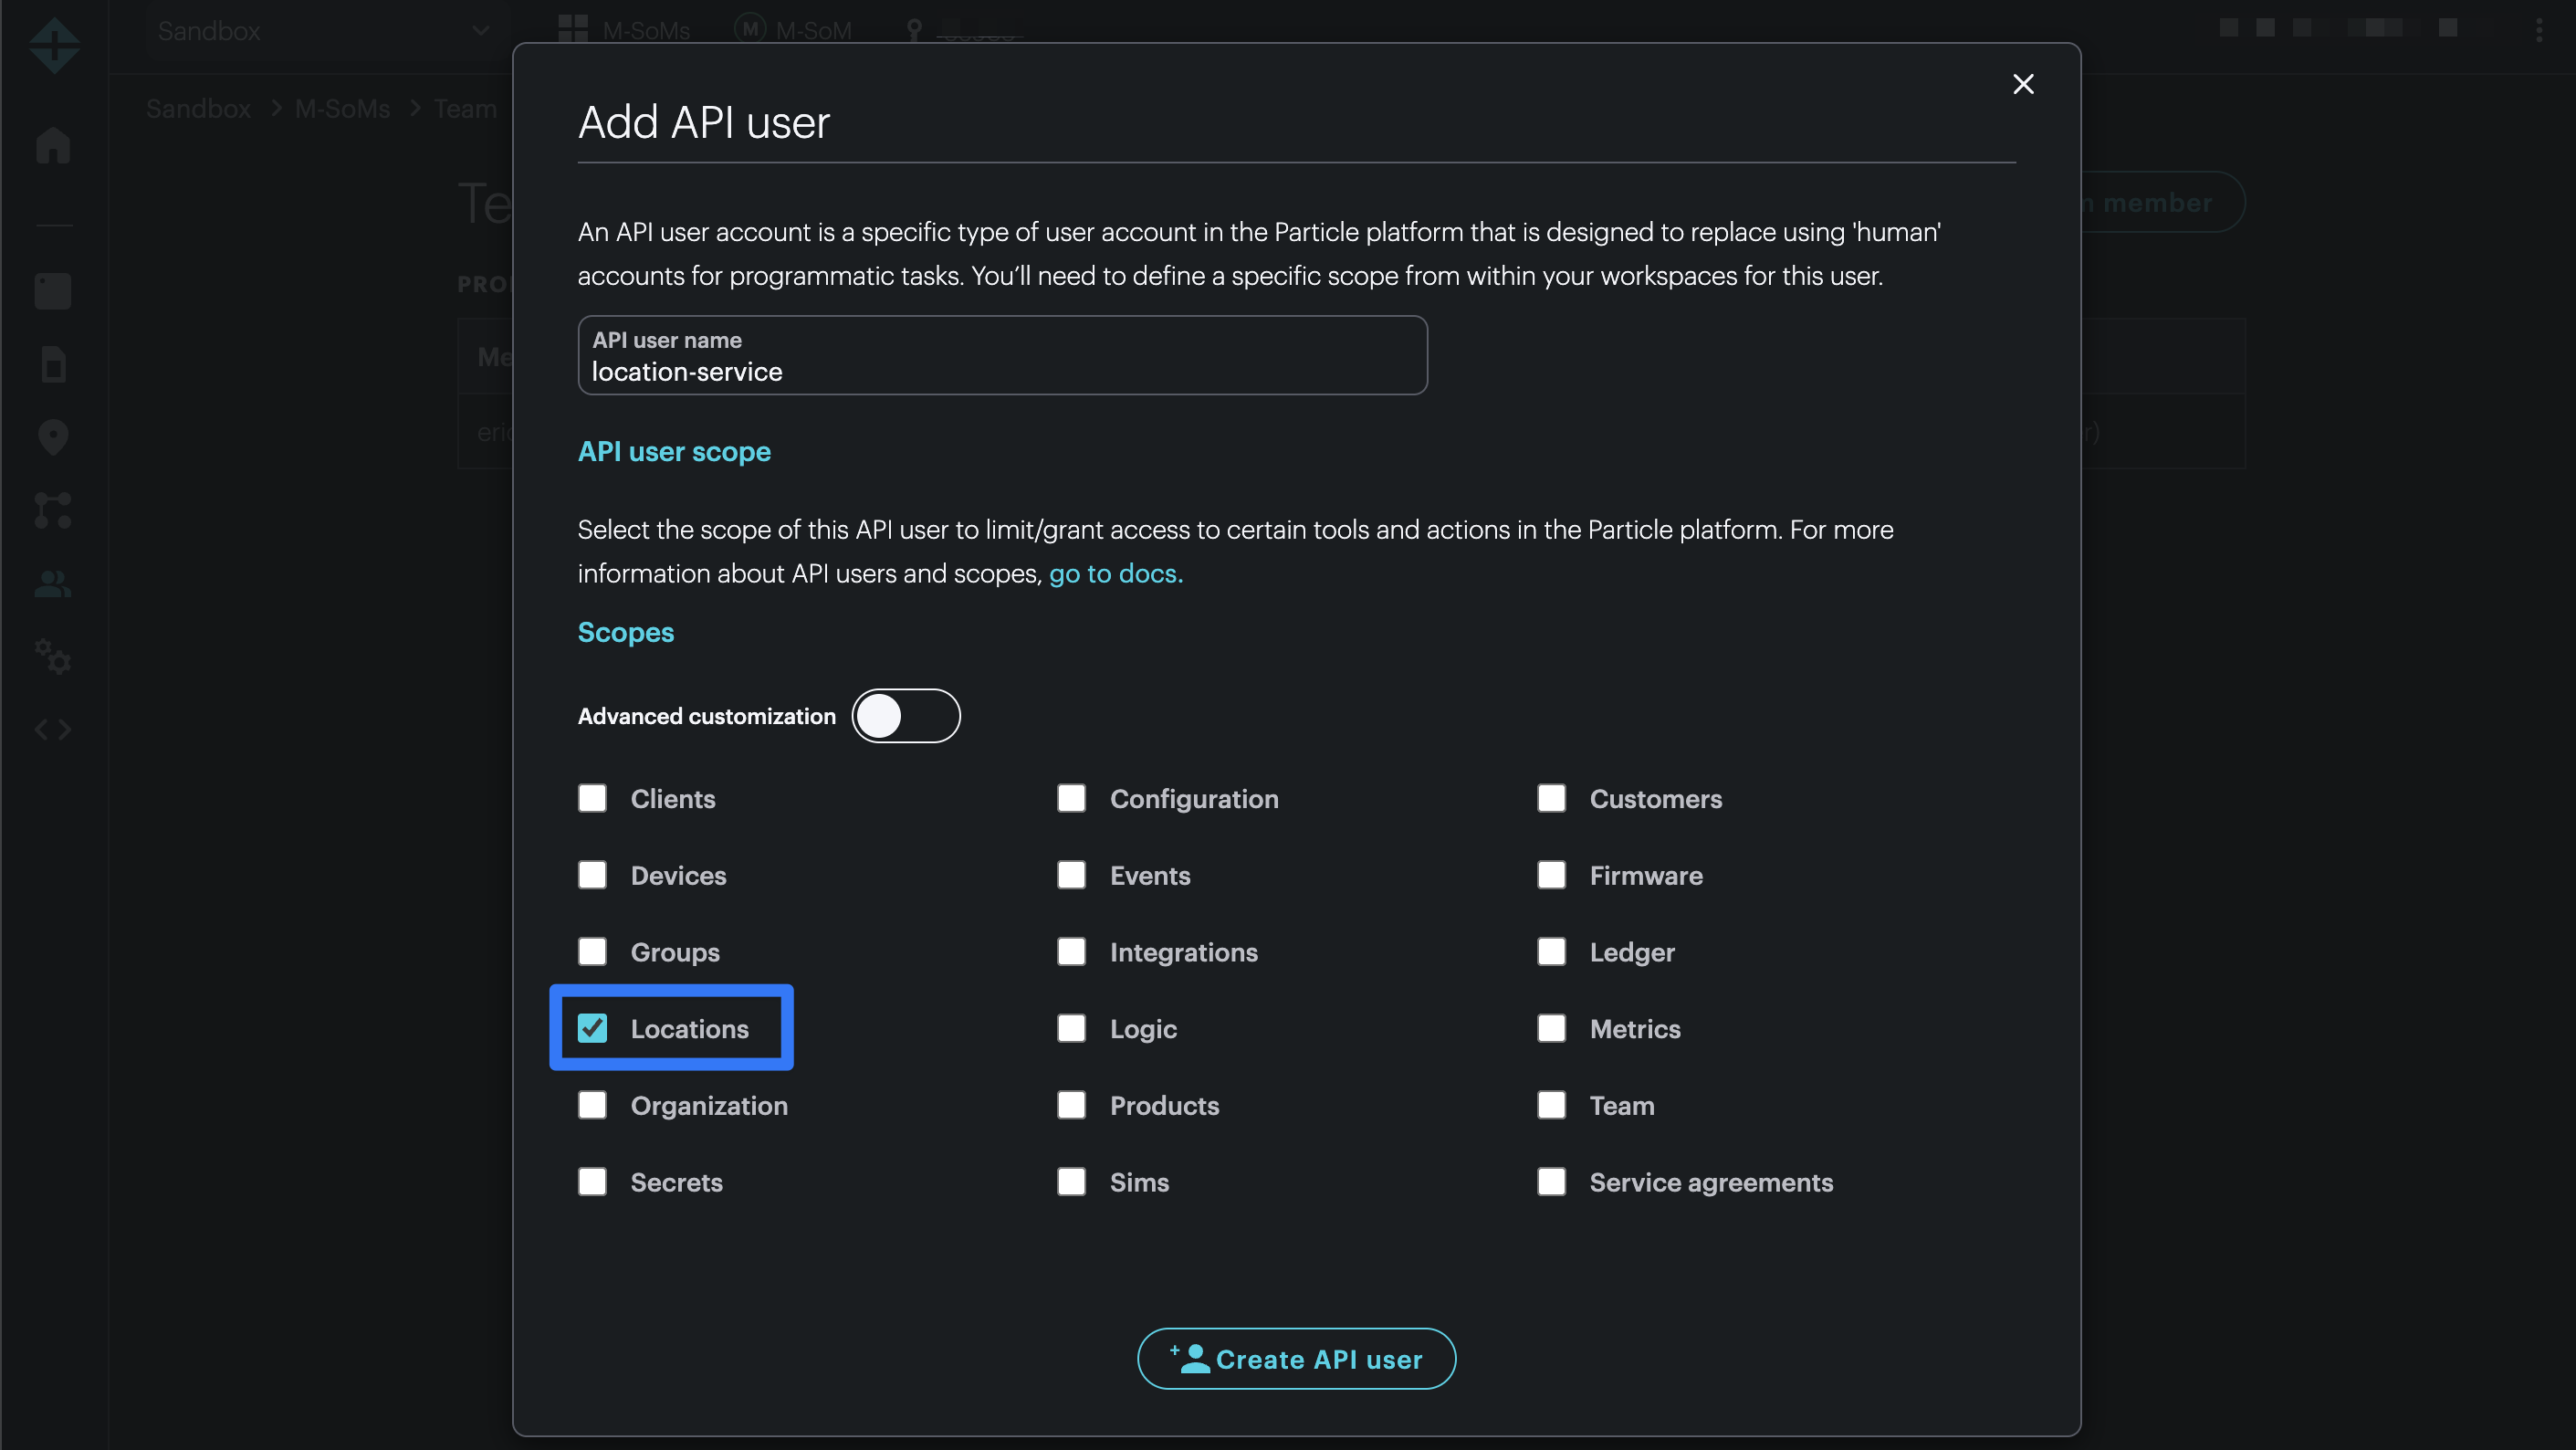
Give your new API user a name and check the “Location” scope. Choose “Create API user” and make note of the access token that was generated.
center
Now, back in the project folder that you’ve downloaded from the repository, open the enhanced-location-api folder in VSCode, or a text editor of your choice.
Then in the root of enhanced-location-api create a new file named .env. Copy the below contents into .env .
PARTICLE_PRODUCT_ID=""
PARTICLE_ACCESS_TOKEN=""
PARTICLE_DEVICE_ID=""
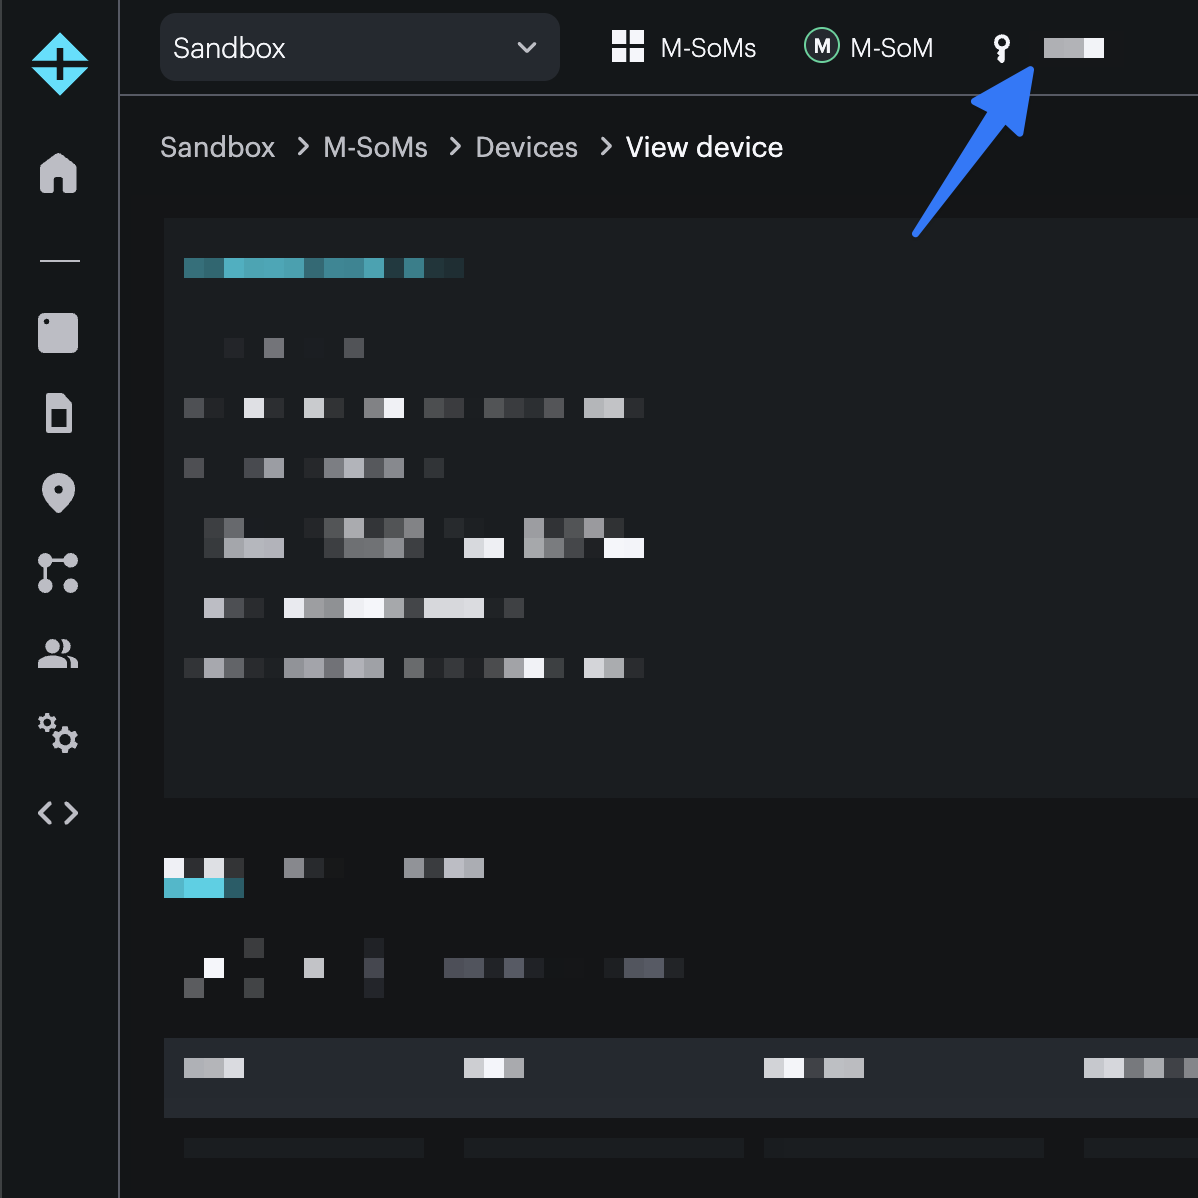
Add the API user’s token (from the previous step) to the PARTICLE_ACCESS_TOKEN entry. The PARTICLE_PRODUCT_ID can be found in the product view of the console:
center
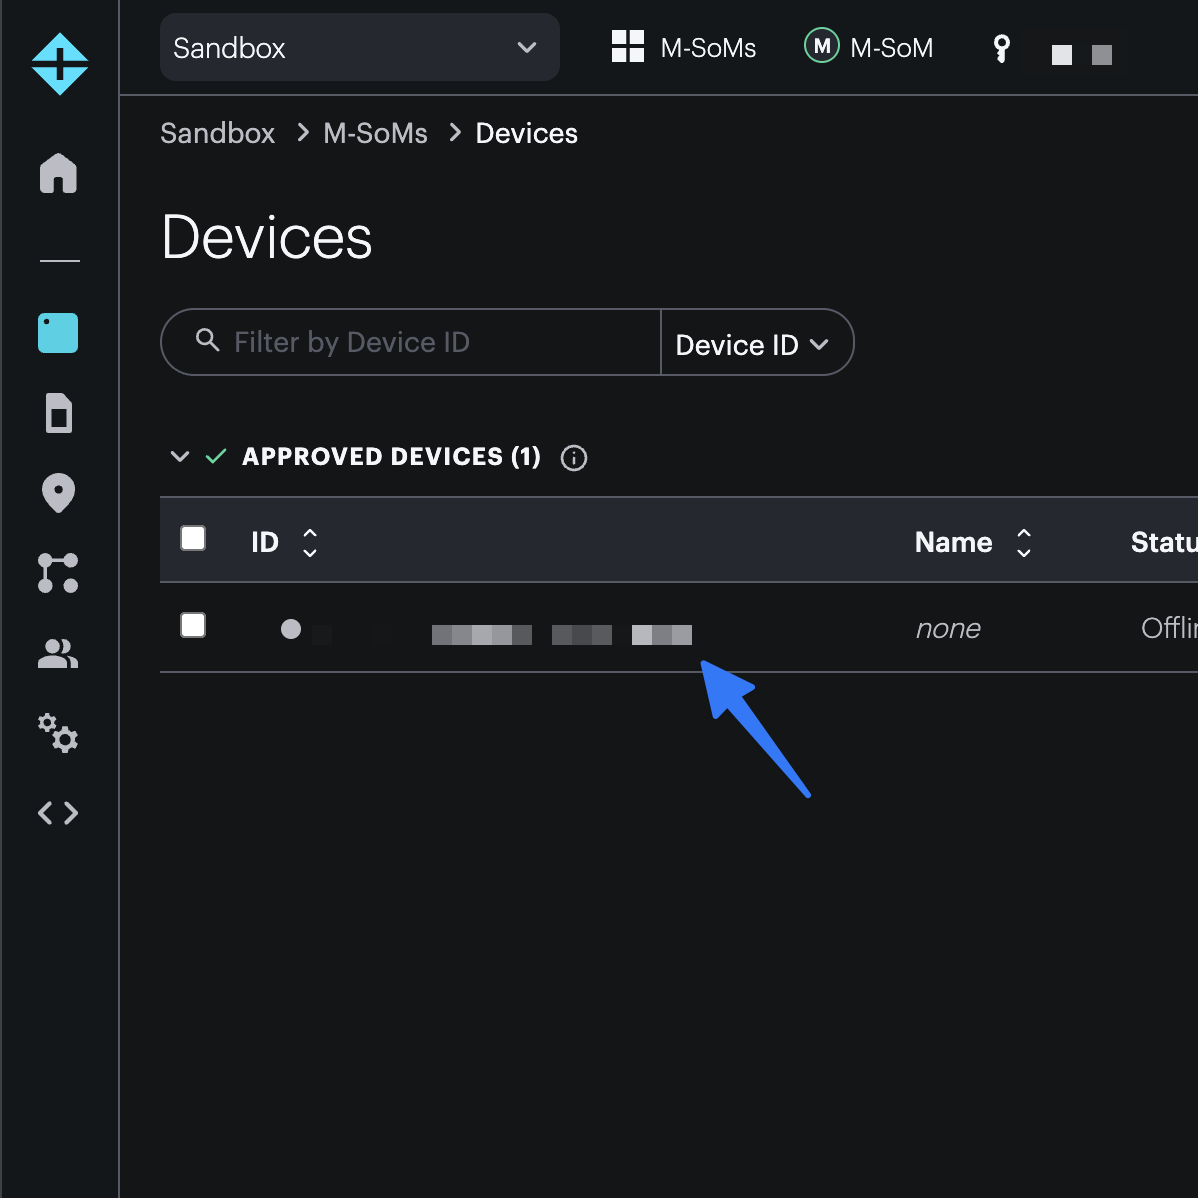
The PARTICLE_DEVICE_ID can be copied from the device view in the console or by running particle identify in a terminal with a device plugged in.
center
With the environment variables populated, run npm install to pull in all of the dependencies. Note that you will need to have Node.js and NPM installed for this step to work properly.
To view the output from the location API, run: npm run start. The program logsresponse.data from the API response, and from the output you can see some useful properties such as horizontal_accuracy and the geometry.coordinates array.
{
  location: {
    device_id: "...",
    geometry: {
      type: "Point",
      coordinates: [
        <longitude>,
        <latitude>,
      ],
    },
    sources: [
      "cell",
    ],
    horizontal_accuracy: 215,
    product_id: ...,
    last_heard: "2025-10-28T19:57:35.000Z",
    gps_lock: false,
    triggers: [
    ],
    updatedAt: "2025-10-28T19:57:36.904Z",
    timestamps: [
      "2025-10-28T19:57:35.000Z",
    ],
    properties: [
      {
      },
    ],
    groups: [
    ],
    online: true,
  },
  meta: {
  },
}
Conclusion
This serves as a simple example of how you can use a cell tower lookup to estimate a device’s location. Then, with a simple API request, you can integrate that location into your final application code. This is a useful feature for tracker products that might routinely lose GPS fix.
Ready to get started?
Learn more about Location fusion
