Video streaming and storage on Tachyon
Configure an AWS Kinesis Video Stream for a webcam feed with YOLOv8 inferencing.


Ready to build your IoT product?
Create your Particle account and get access to:
- Discounted IoT devices
- Device management console
- Developer guides and resources
Introduction
Tachyon’s 5G radio and built-in battery management make it a perfect single-board computer for video streaming in remote locations. It is well suited for a solar panel video streaming deployment wherever you might need remote monitoring. In this post, we’ll discuss how to set up an AWS Kinesis Video Stream (KVS) for a webcam feed. KVS allows for up to 10 years of video storage and playback making it a perfect tool for deployments in the field. We’ll also add in a YOLOv8 inference step with OpenCV to illustrate a real world AI application.
AWS provisioning
Before we begin, it’s worth noting that most of these steps come from a video tutorial by AWS. It’s worth using as a fallback reference.
IoT Core
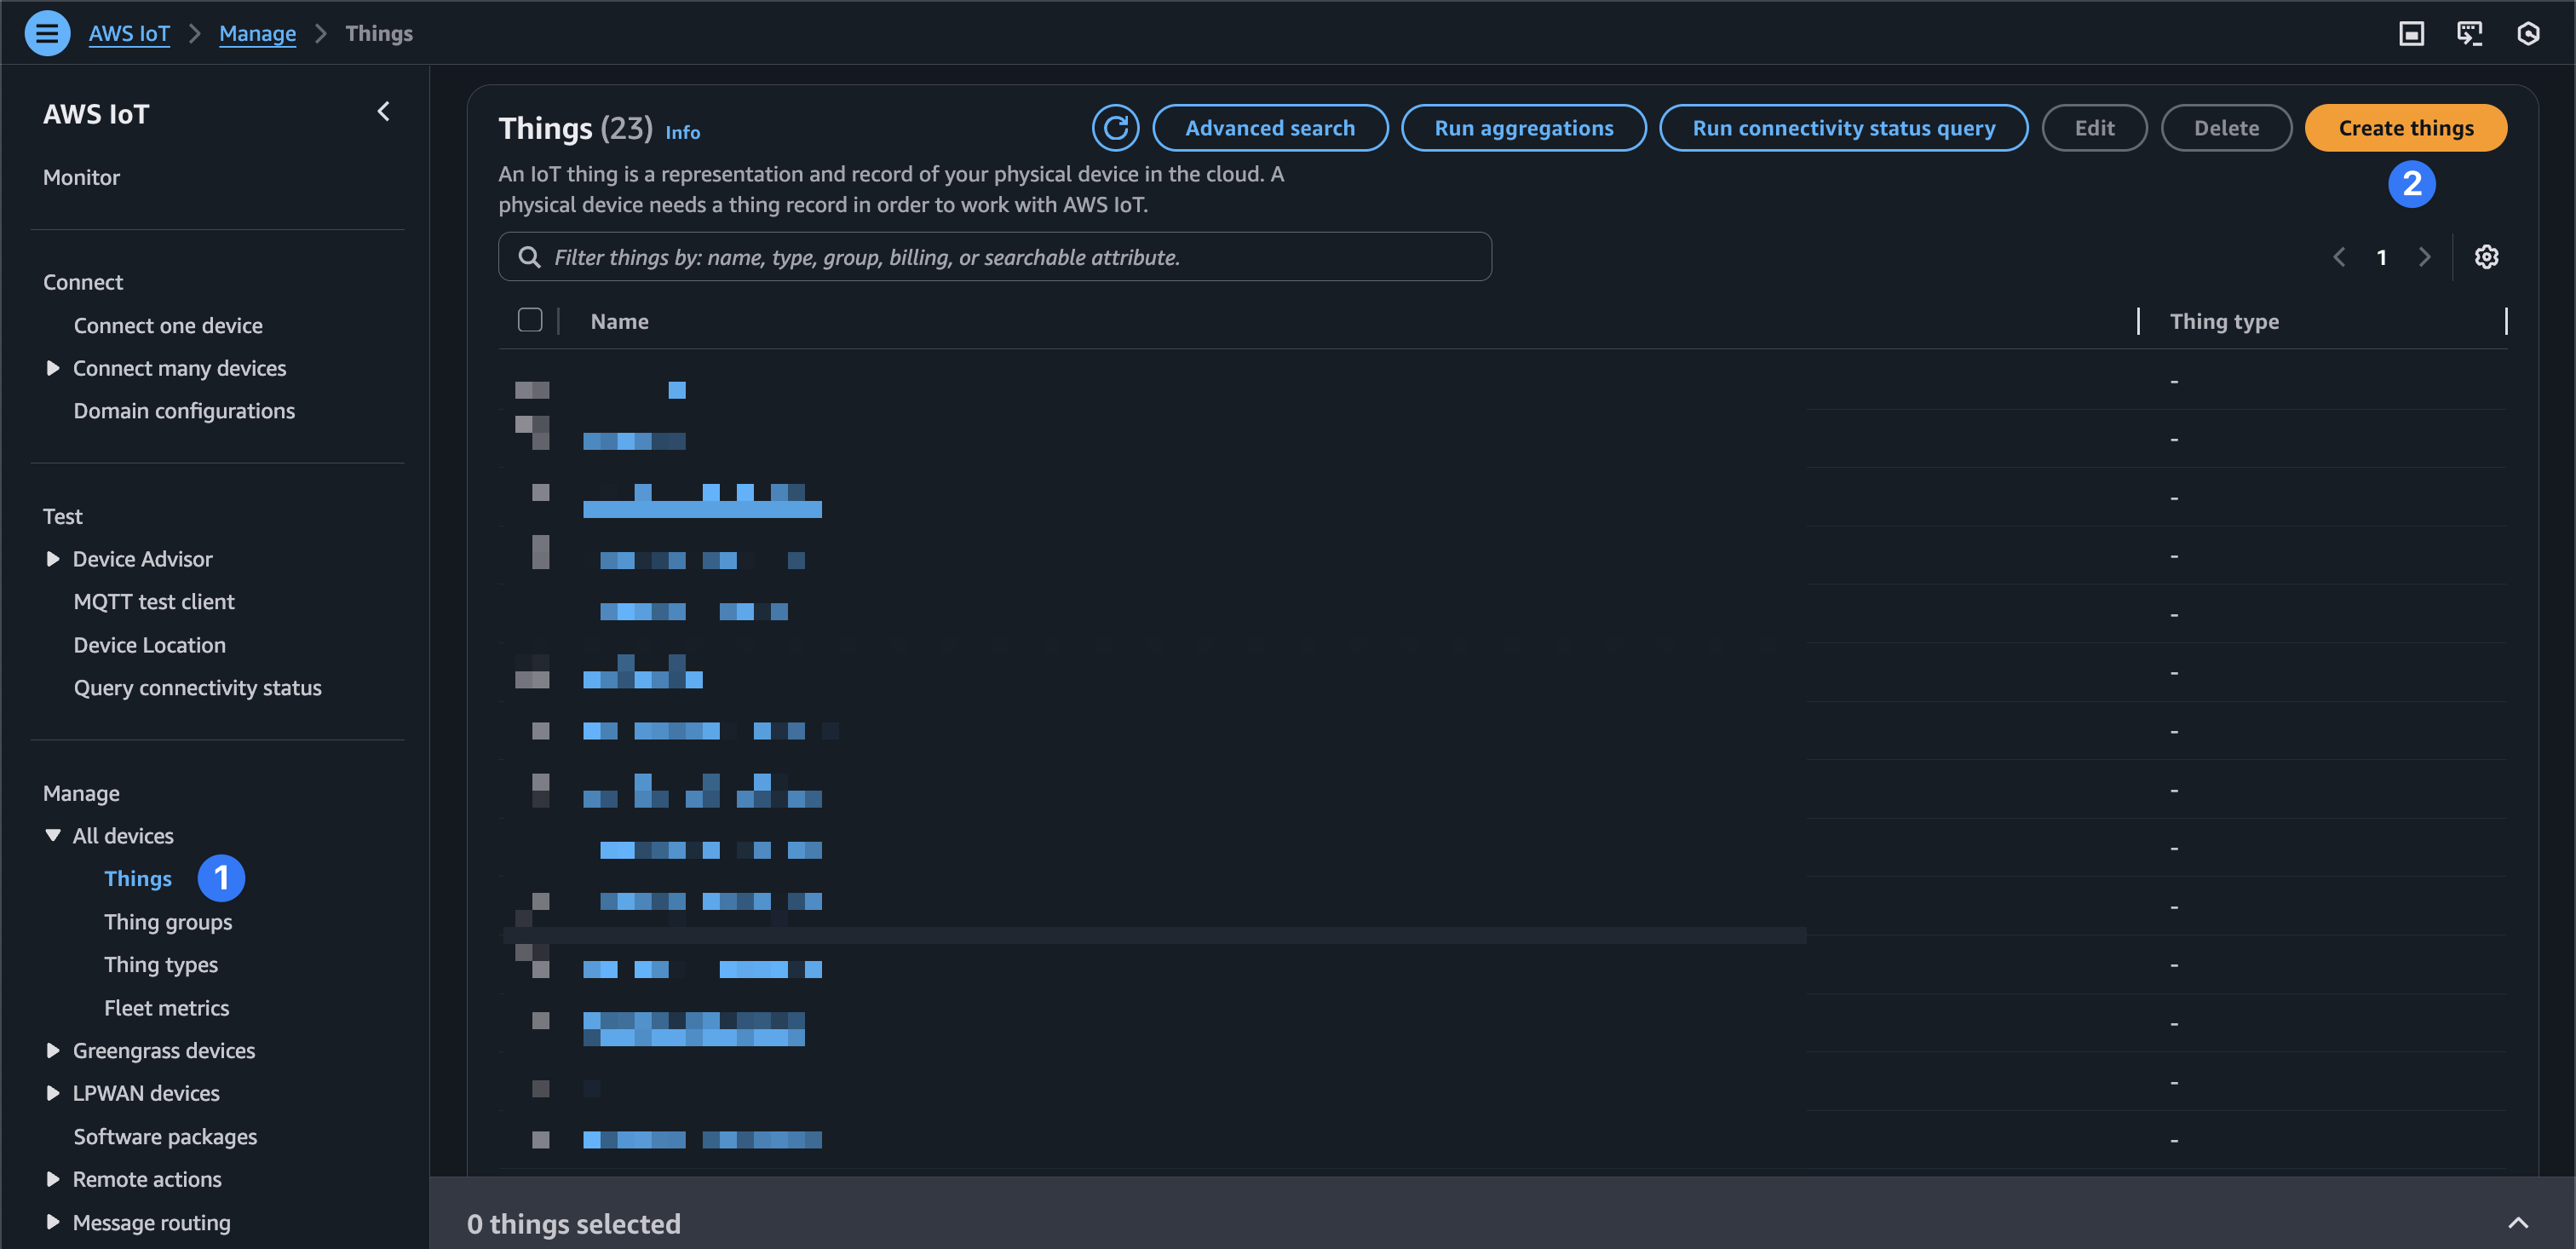
First, in the AWS IoT Core console, you will need to create a new “Thing.” On the side panel, navigate to the “Things” page and choose “Create things.”
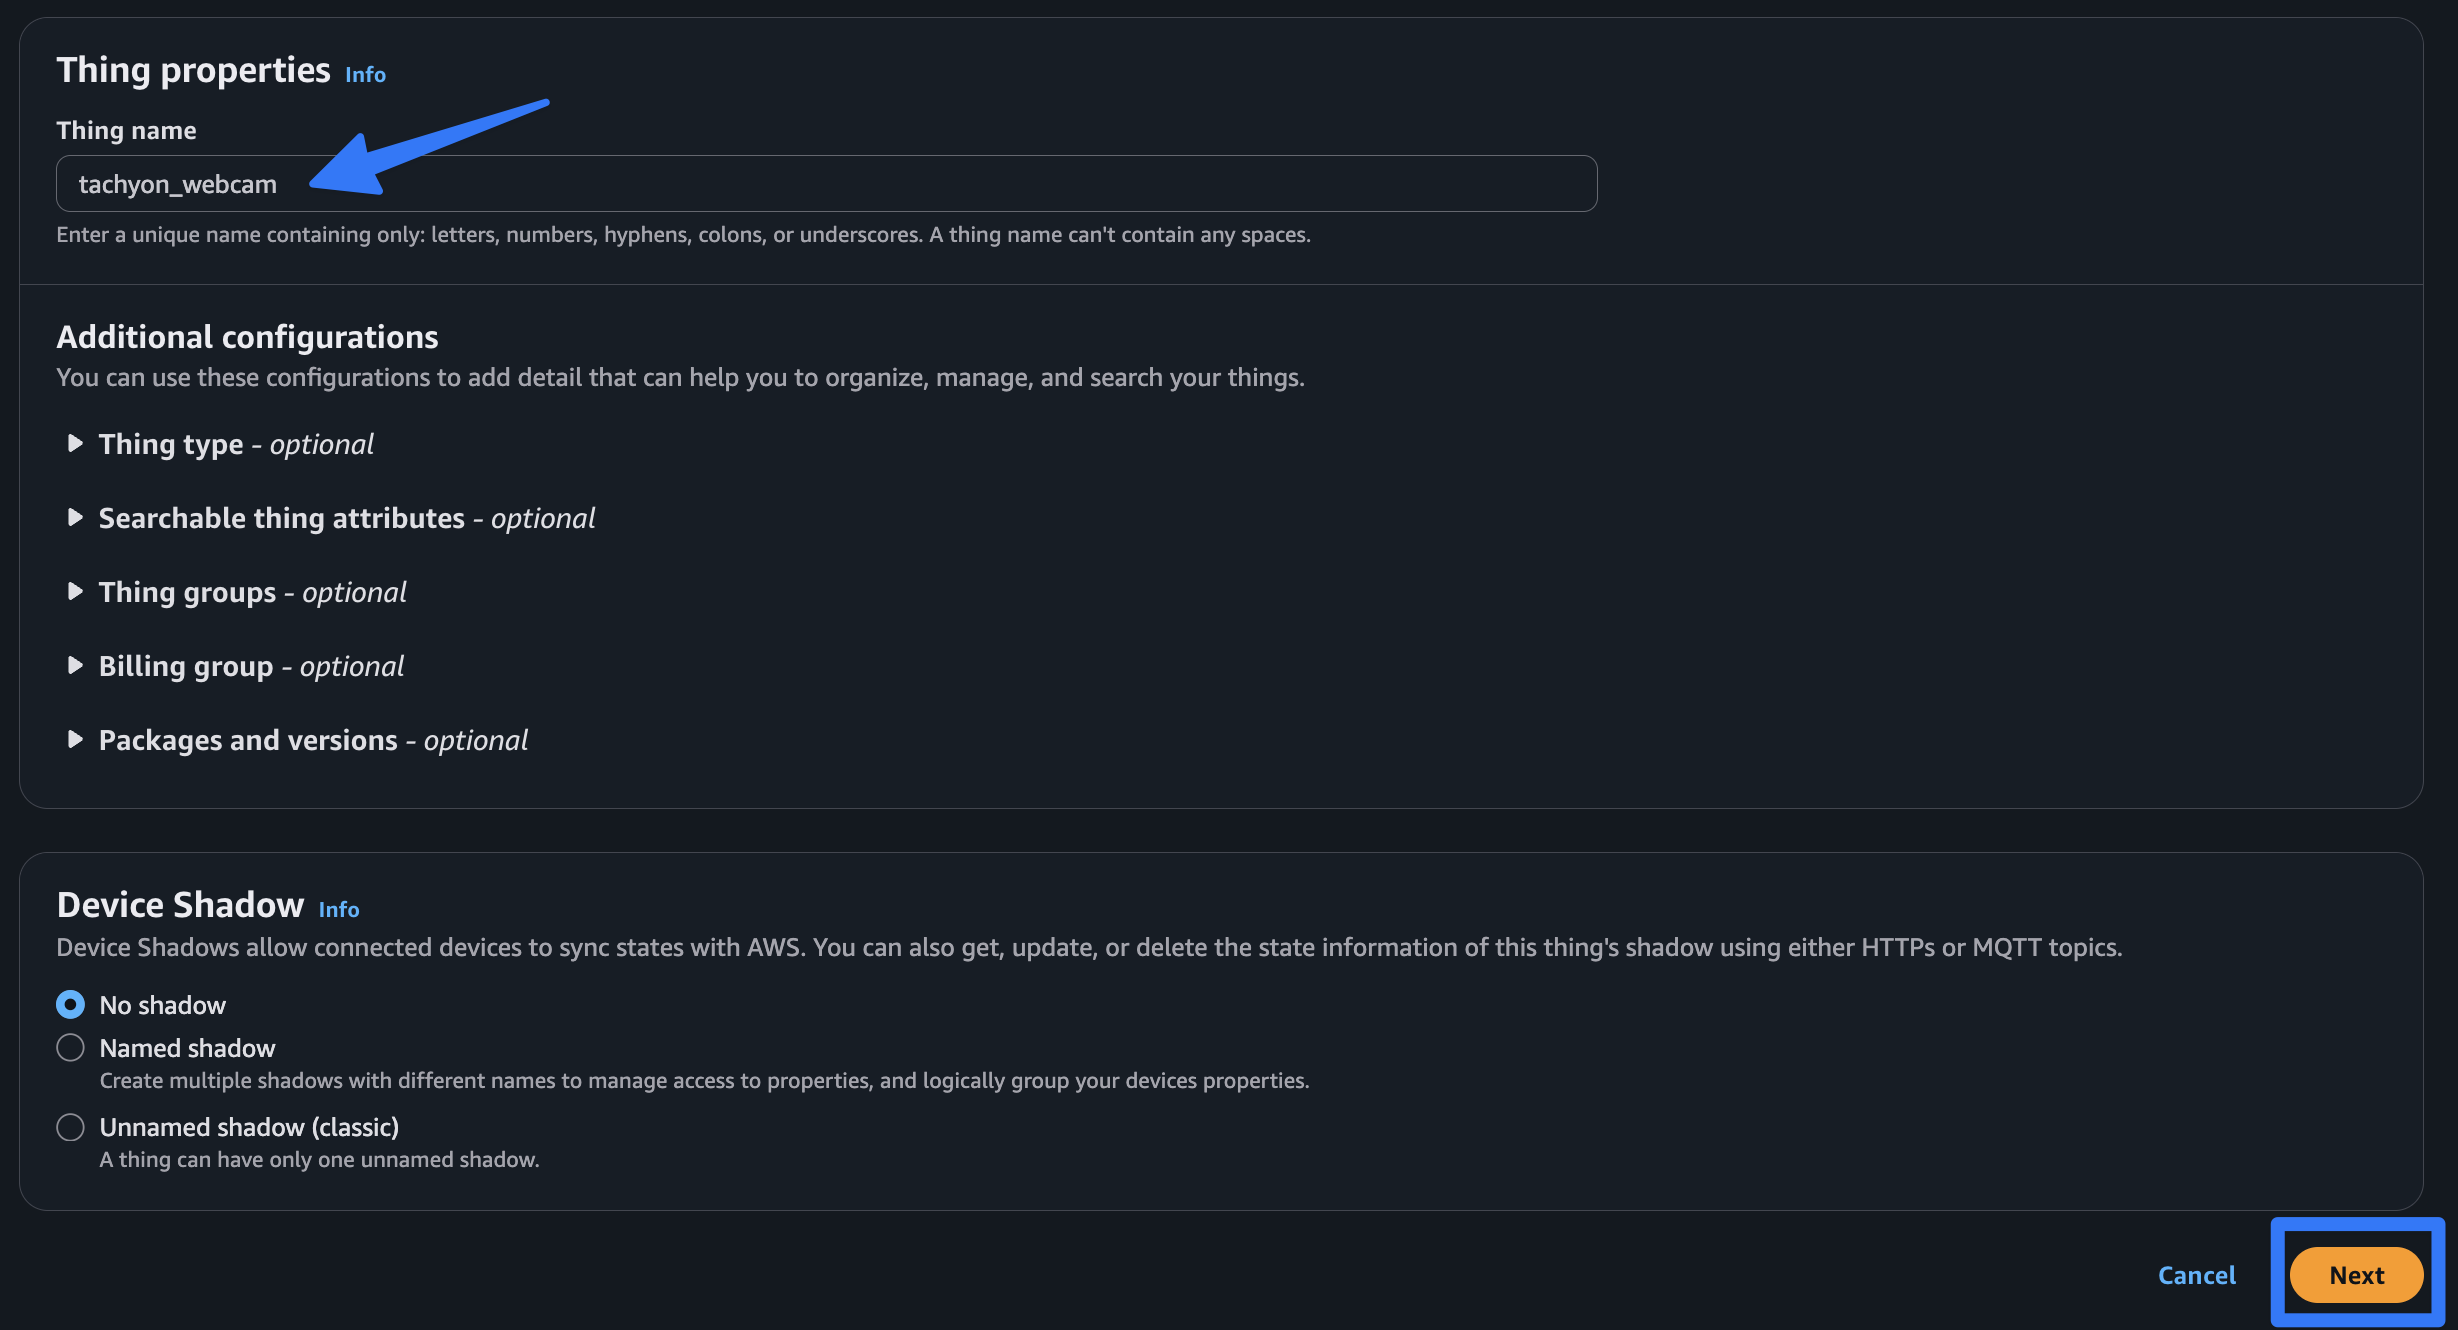
Create a single thing and give it a name. Note that the name you give your AWS IoT thing will also have to be the same name as your Kinesis Video Stream. Leave the default properties and choose “Next.”
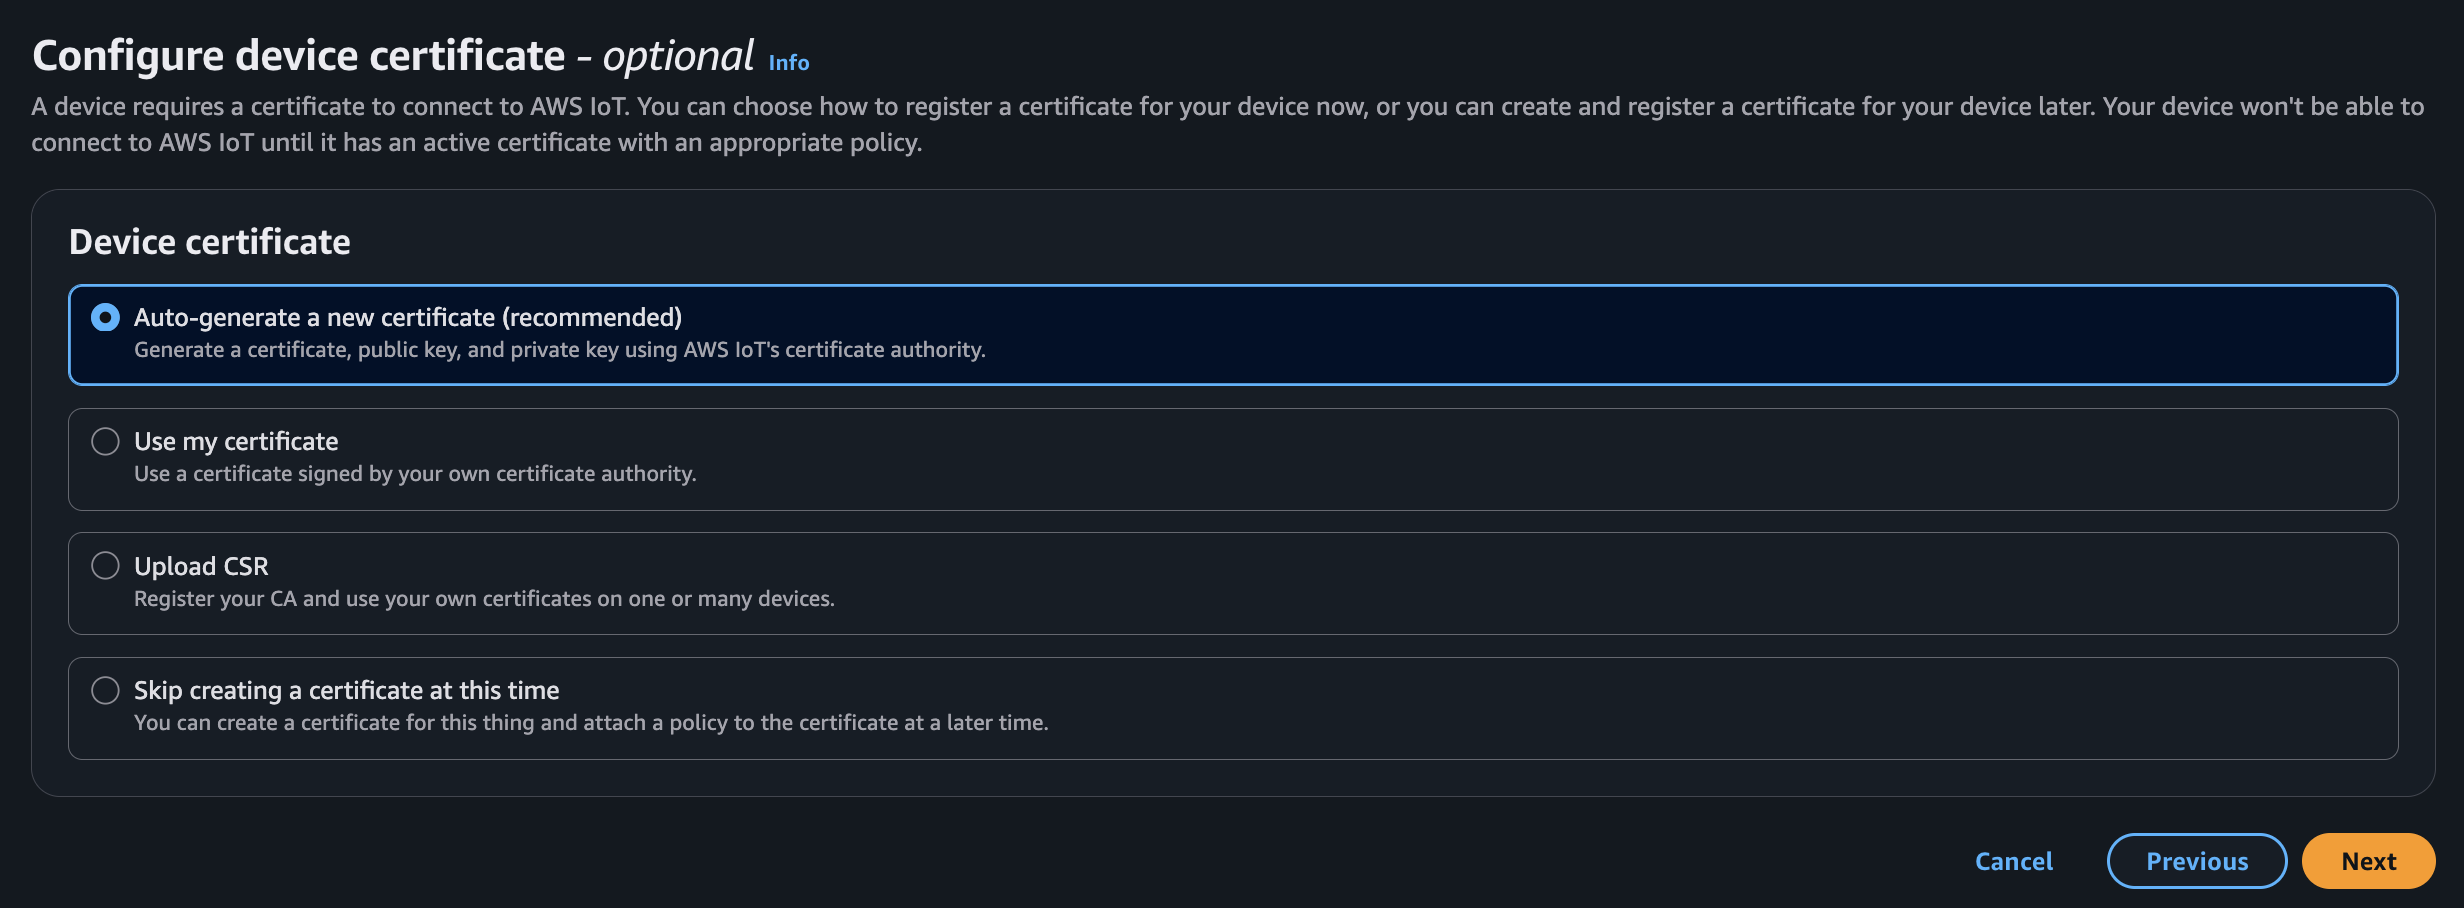
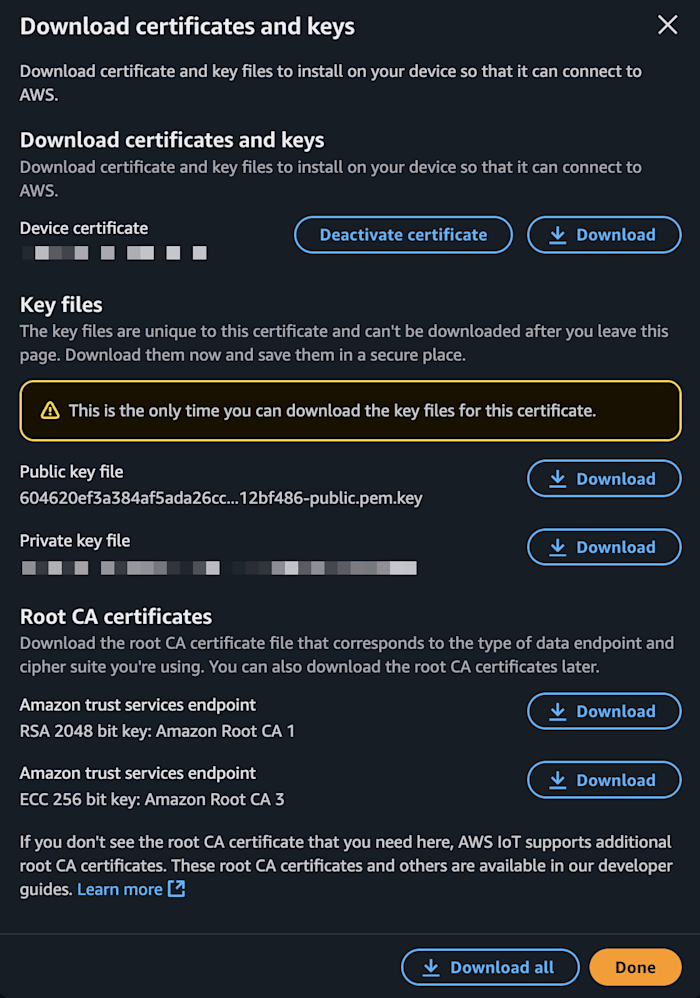
Auto generate new certificates for your thing.
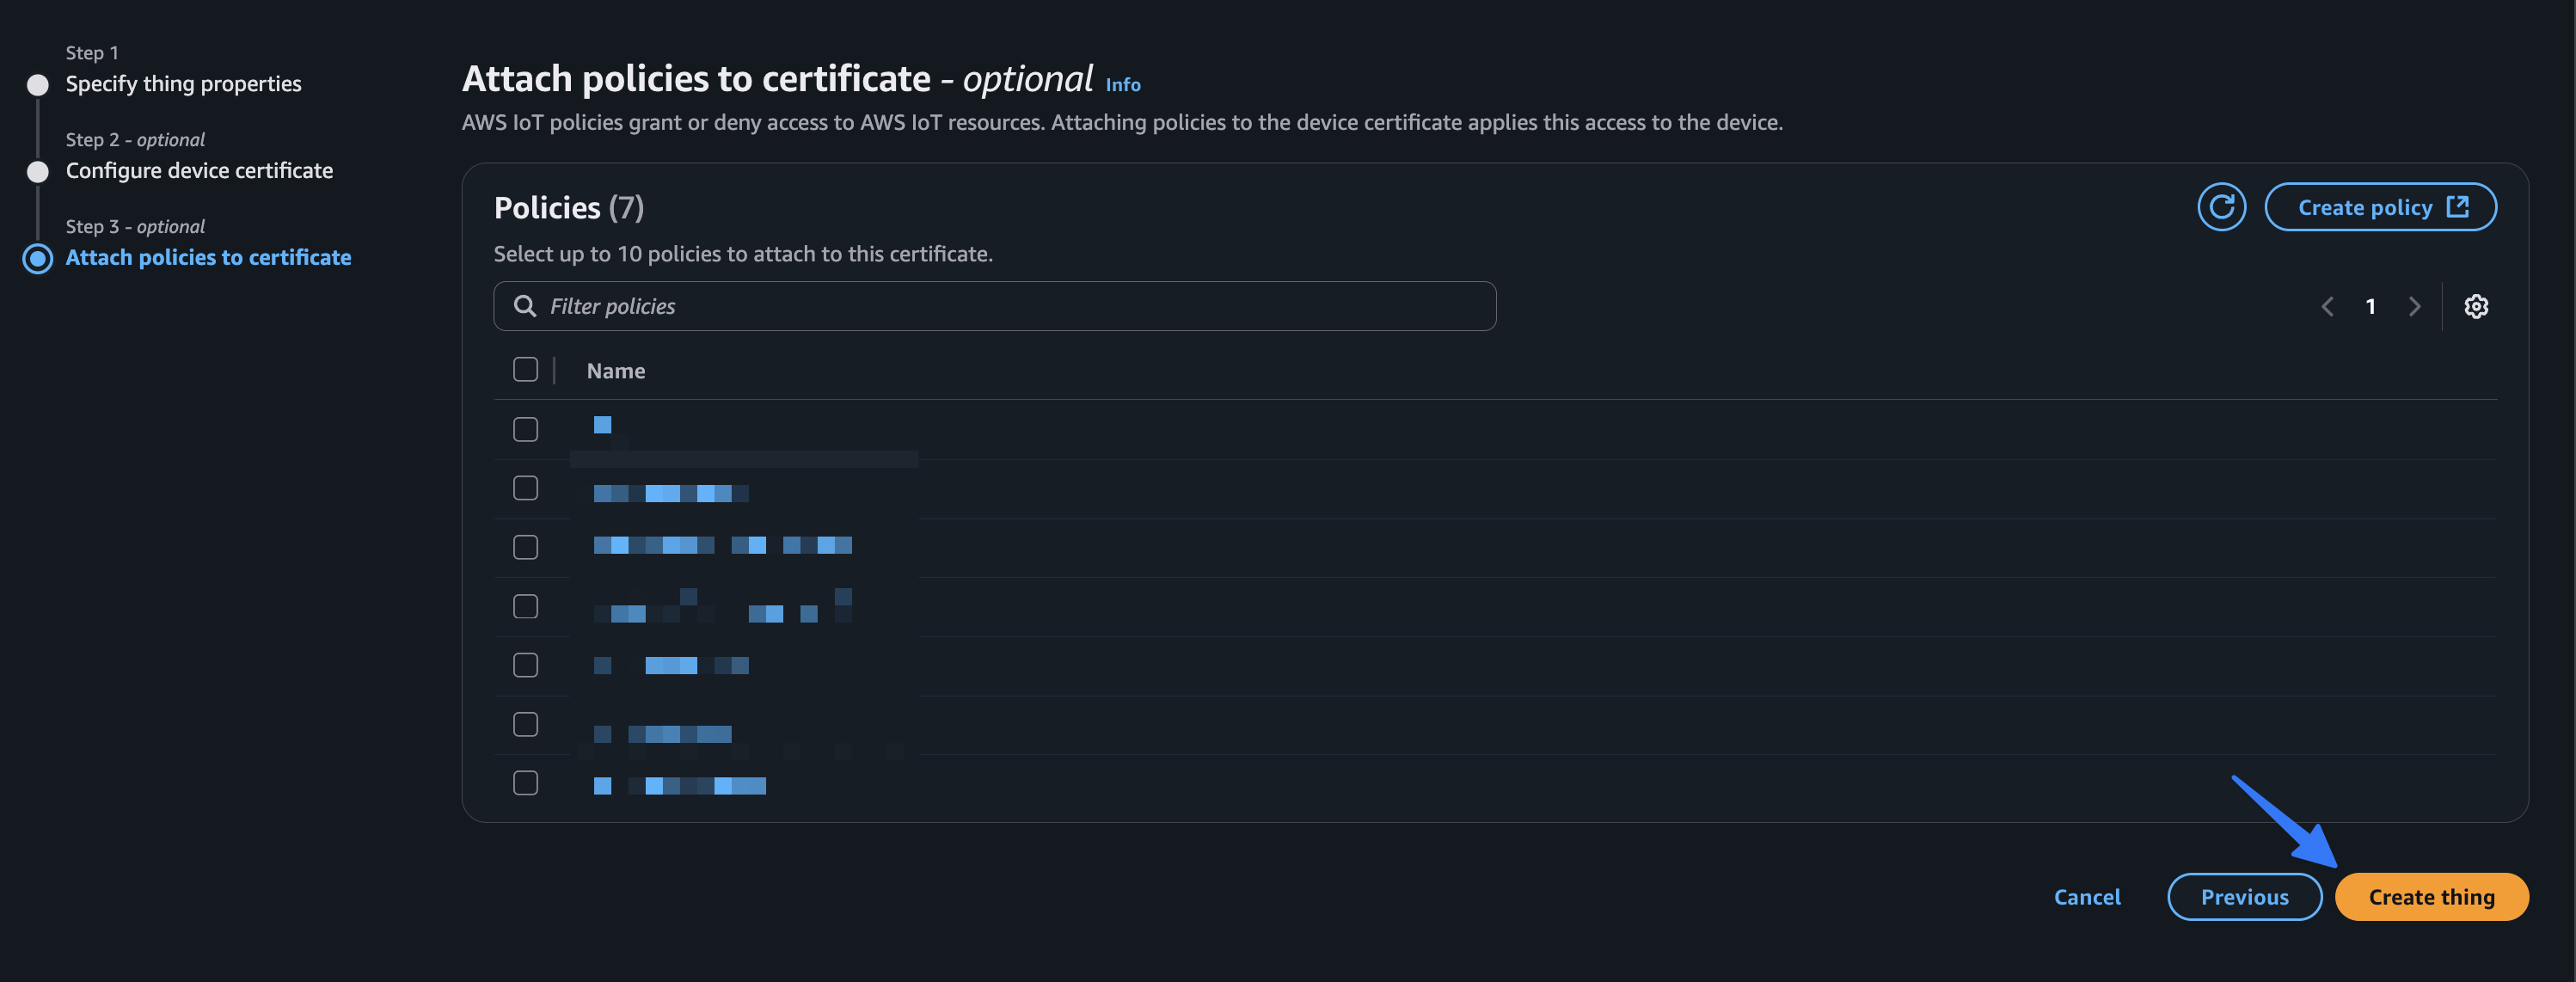
We’ll skip attaching a policy at this time. We will manage the permissions in a later step, so simply choose “Create thing” without selecting anything.
Make sure to download all of the thing’s certificates before navigating away.
center
IAM policy
Now let’s create an IAM policy to allow our device to stream to KVS. Navigate to the IAM service in your AWS console and choose “policies” and “Create policy.”

Select the JSON toggle and paste in the following content.
{
    "Version": "2012-10-17",
    "Statement": [
        {
            "Effect": "Allow",
            "Action": [
                "kinesisvideo:DescribeStream",
                "kinesisvideo:PutMedia",
                "kinesisvideo:TagStream",
                "kinesisvideo:GetDataEndpoint"
            ],
            "Resource": "arn:aws:kinesisvideo:*:*:stream/${credentials-iot:ThingName}/*"
        }
    ]
}

Then select “Next” and give your policy a name. In this case, we’ll choose TachyonIAMPolicy. Then choose “Create policy.”
IAM role
Next, we’ll need to create an IAM role to assume this policy. Back in the IAM service view, choose “roles” and “create role”.

Choose “custom trust policy” and paste in the following JSON.
{
    "Version": "2012-10-17",
    "Statement": [
        {
            "Effect": "Allow",
            "Principal": {
                "Service": "credentials.iot.amazonaws.com"
            },
            "Action": "sts:AssumeRole"
        }
    ]
}
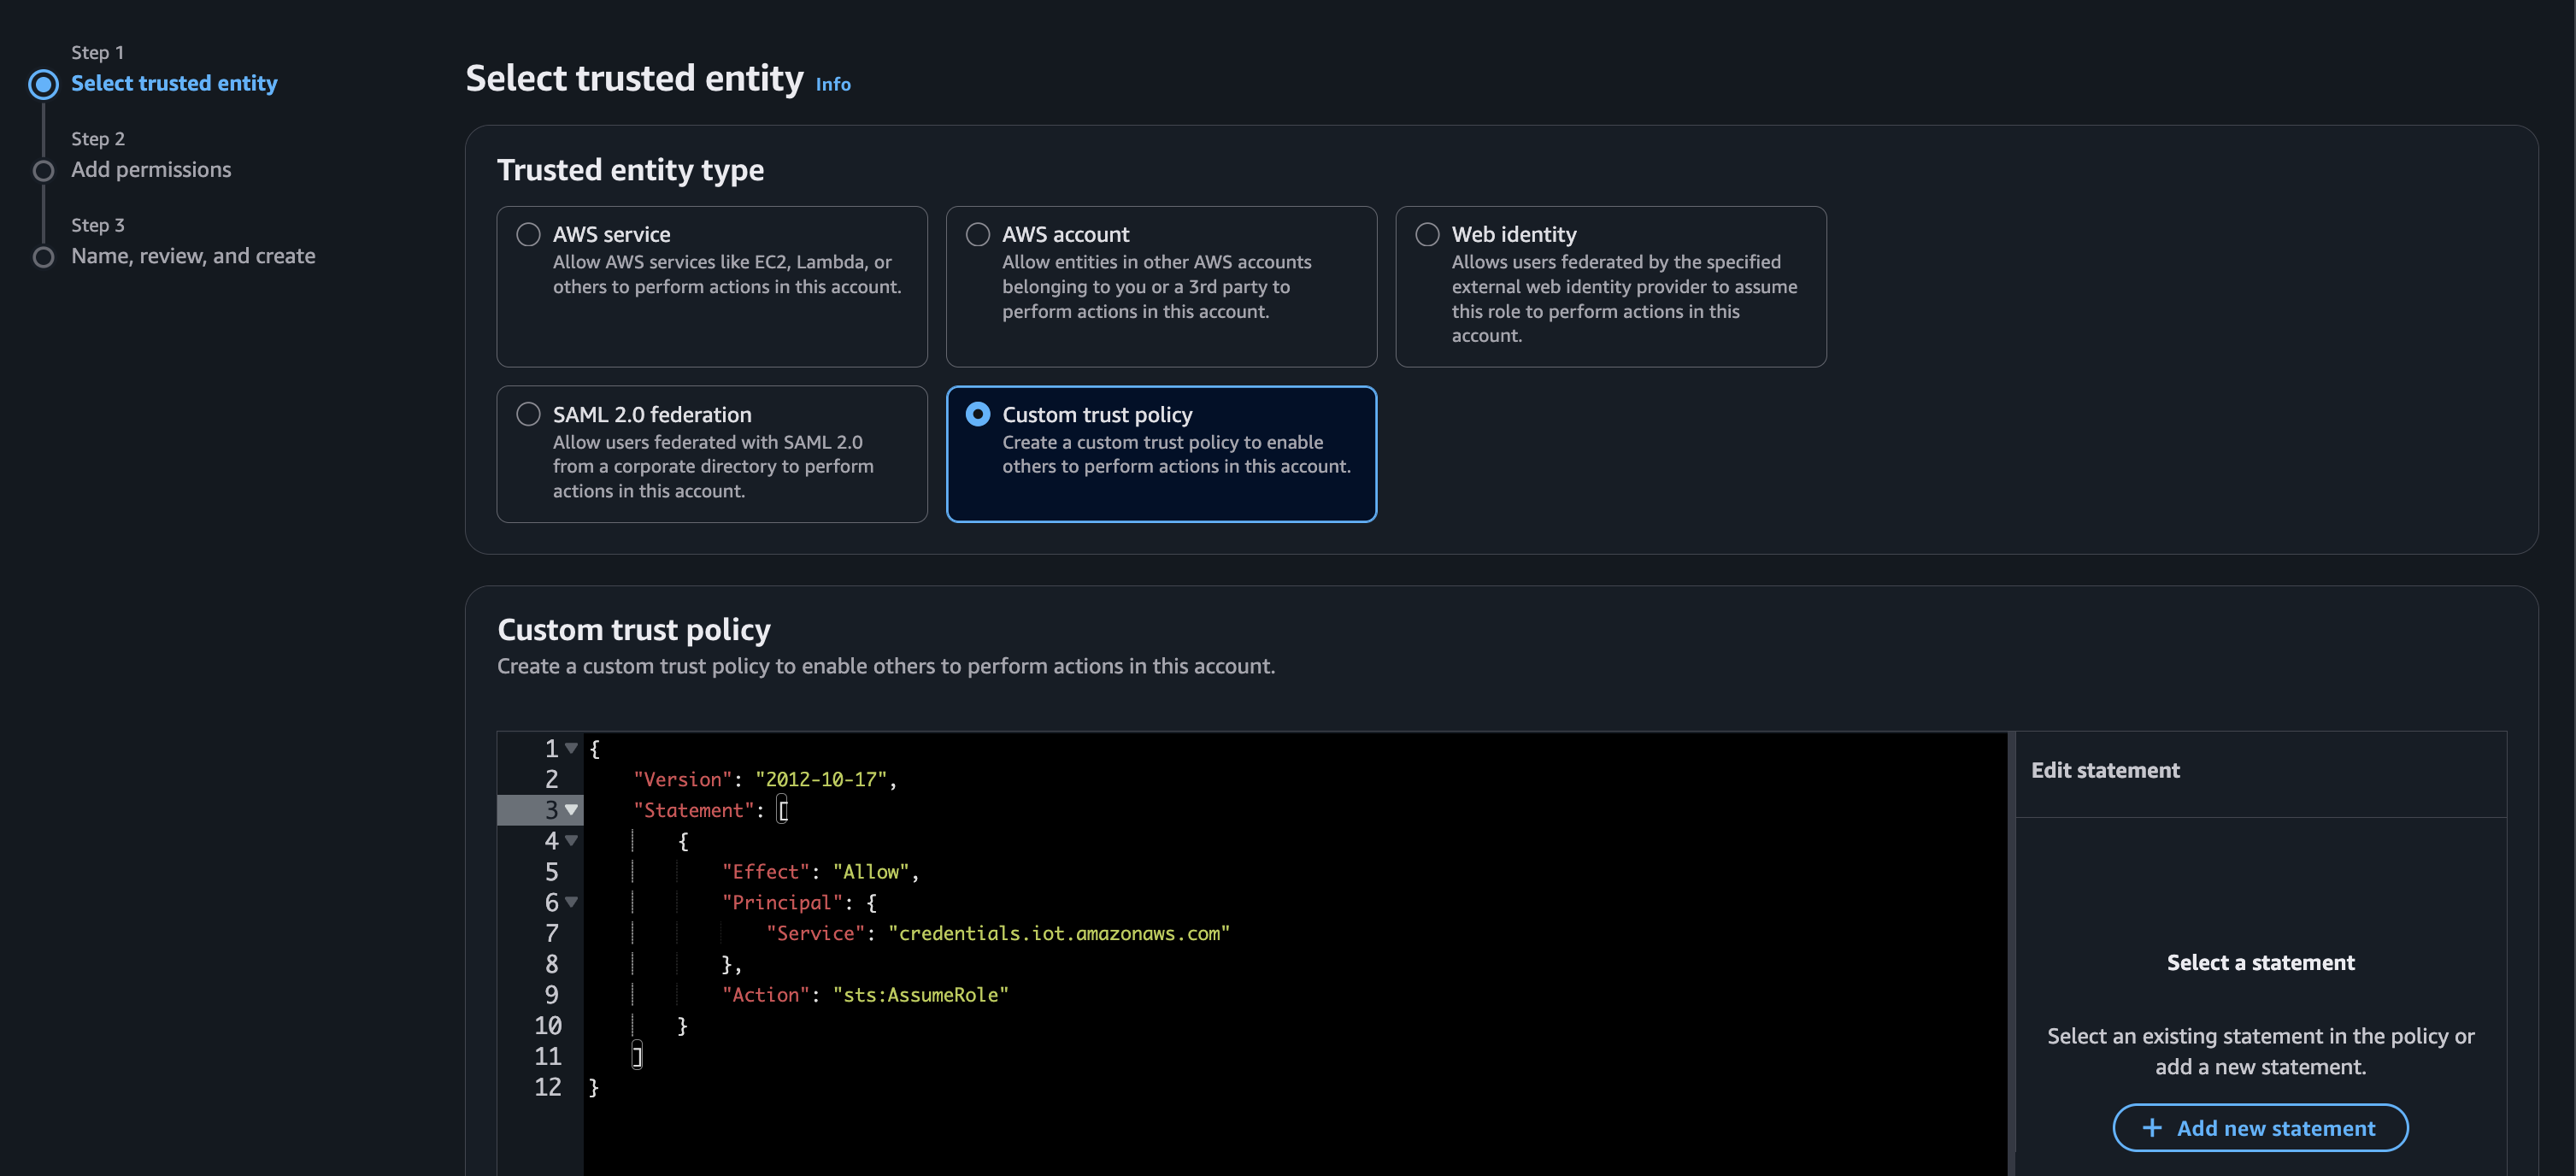
Now, we’ll need to assign the TachyonIAMPolicy to this IAM user. On the next page, search for the name of the policy you created in the previous step, then select it. Choose “Next.”

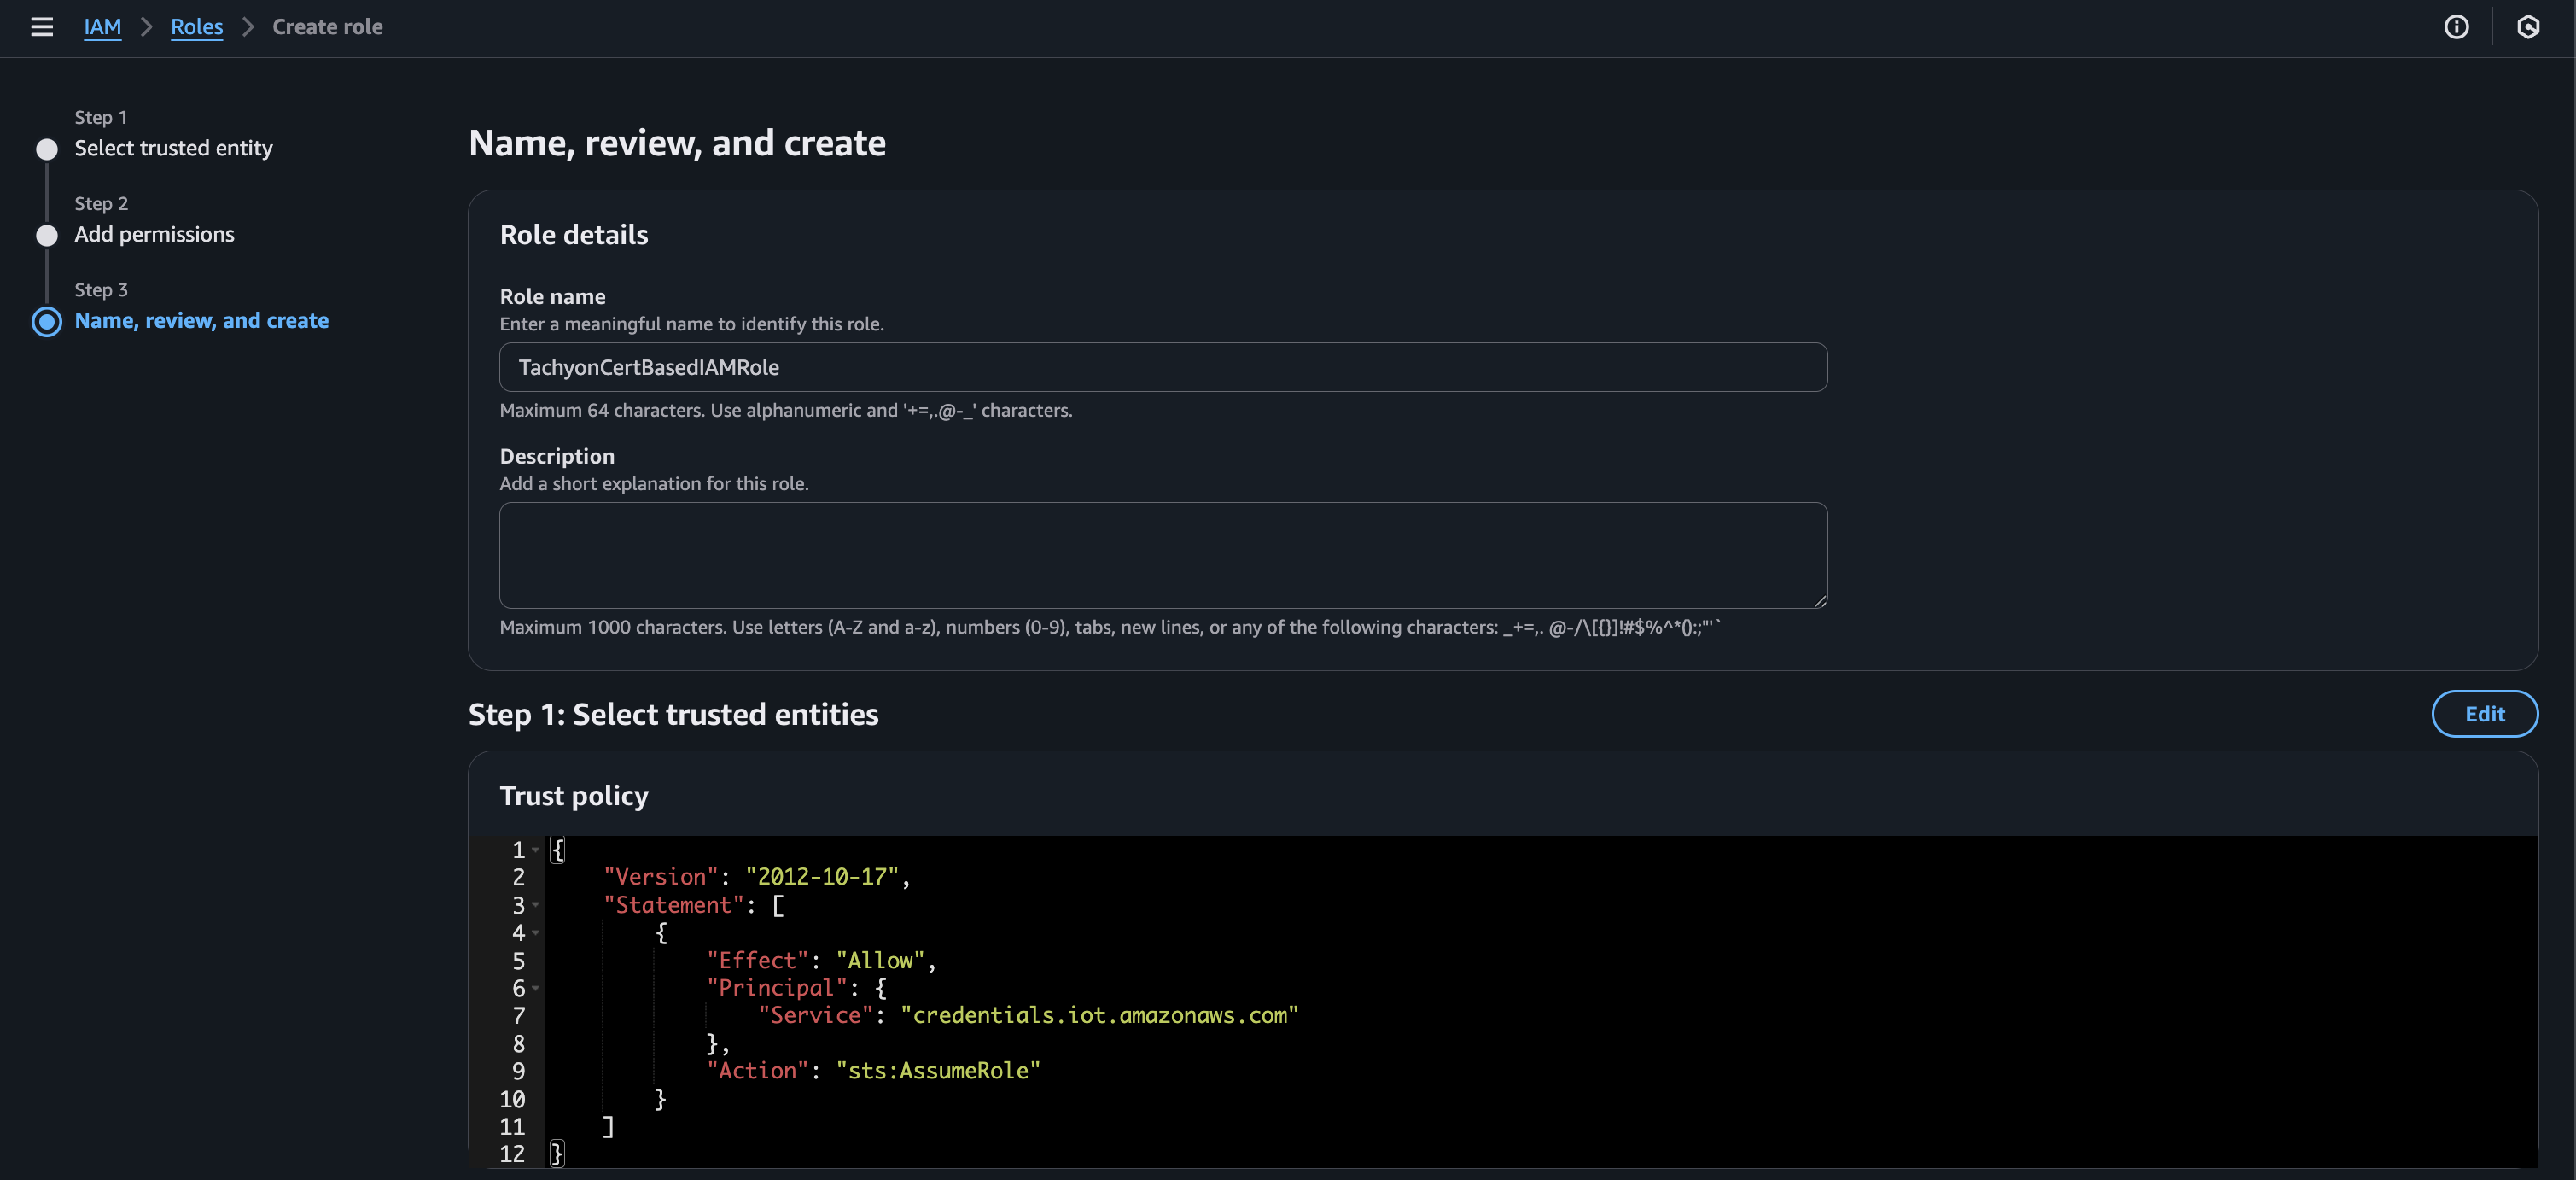
Finally, give your role a name and select “Create role” at the bottom of the page.
Role alias
Back in the IoT Core service, navigate to “security > role aliases” and choose “Create role alias.”
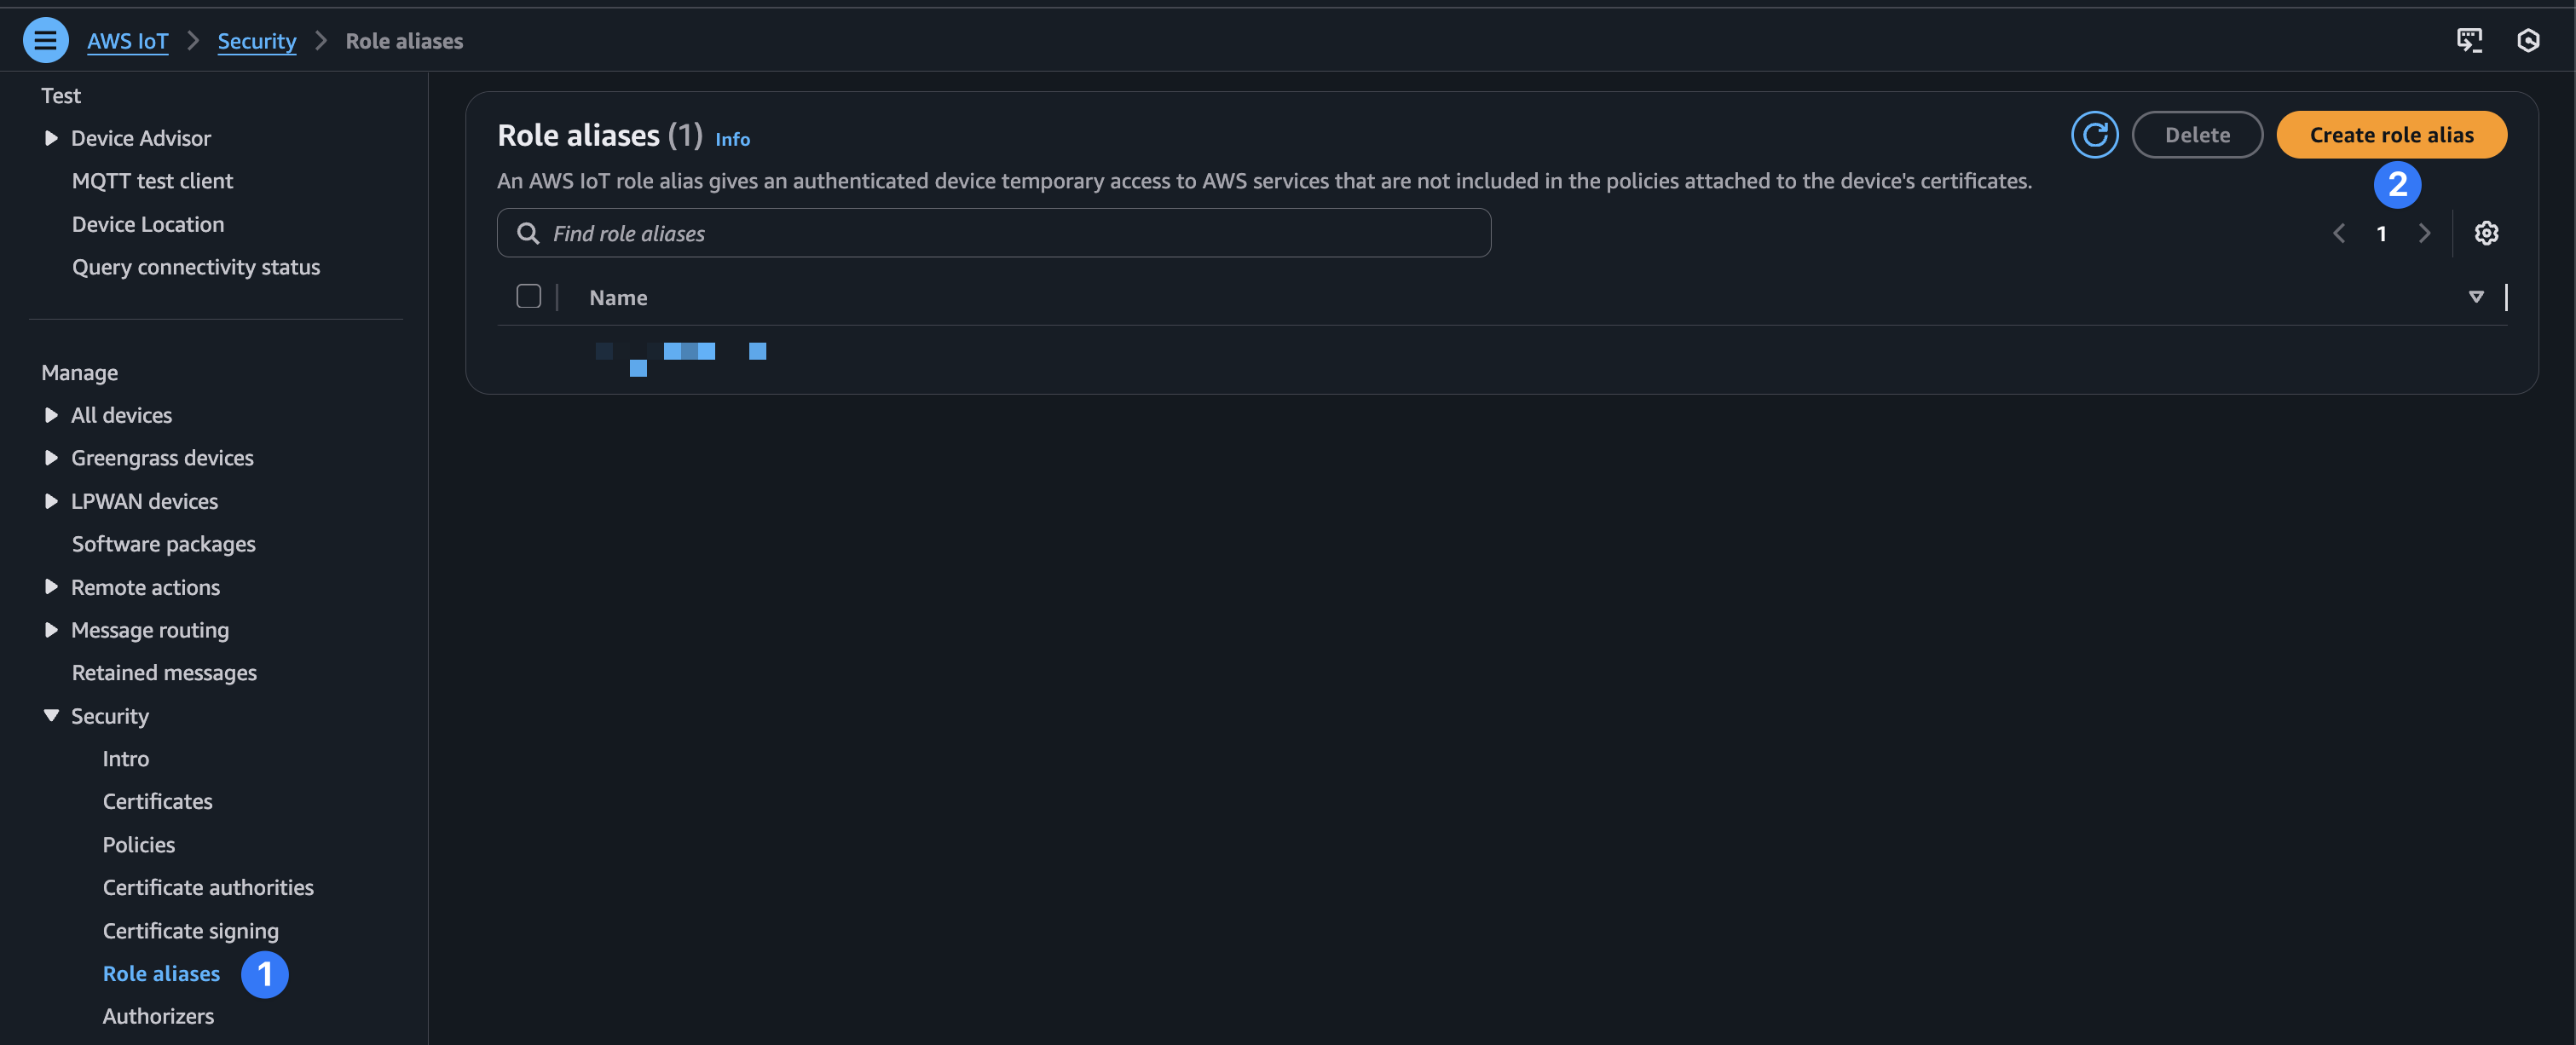
Give your role alias a name and select the IAM role we created in the previous step. Then choose “Create.”
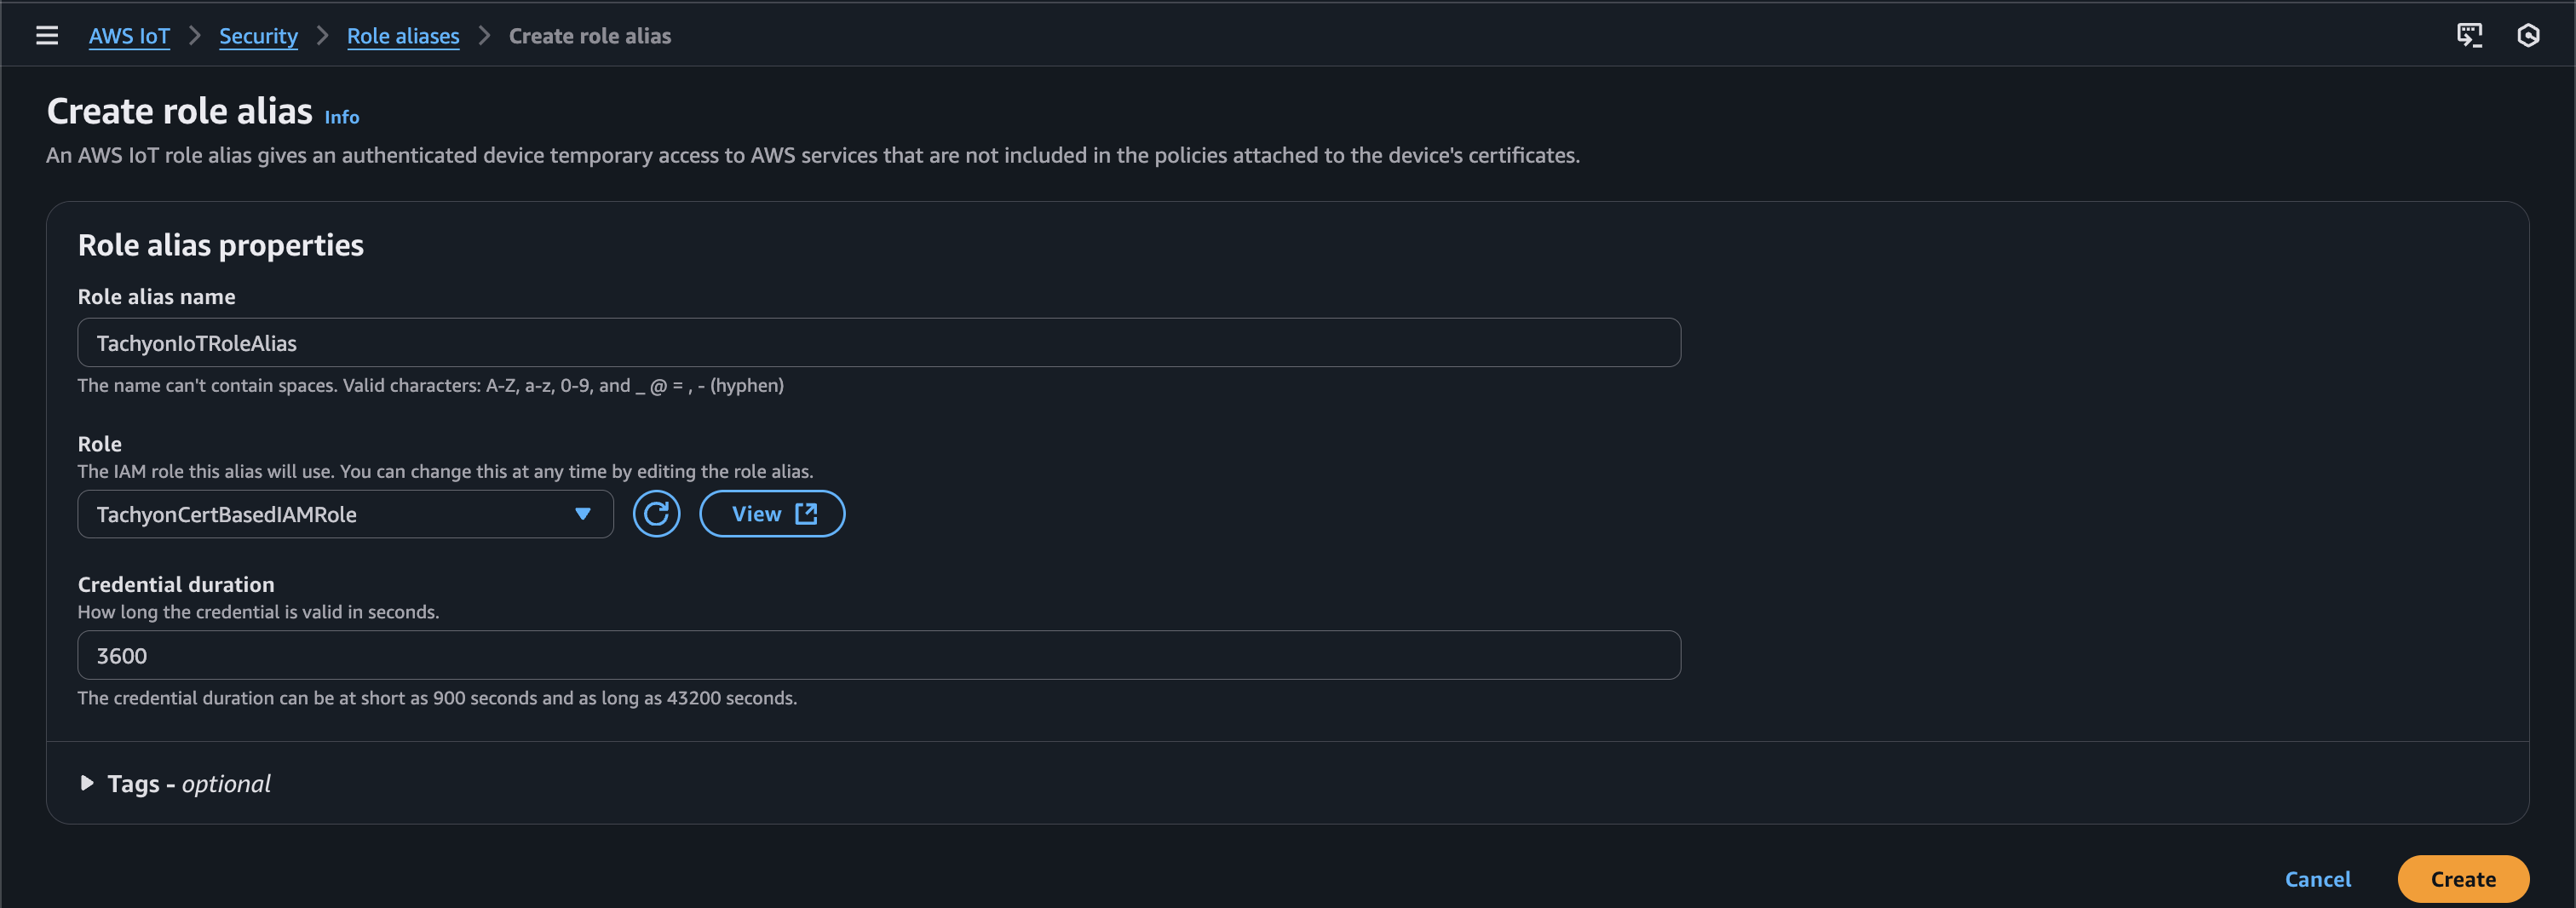
Once finished, click into the newly created role alias and make note of the role alias ARN. It should be similar to the following:
arn:aws:iot:us-east-1:xxx:rolealias/TachyonIoTRoleAlias
Certificate policy
Next, we’ll need to create a policy to attach to the IoT thing certificates that we created earlier. In IoT Core, select “Policies” on the side panel (under Security) and choose “Create policy.”
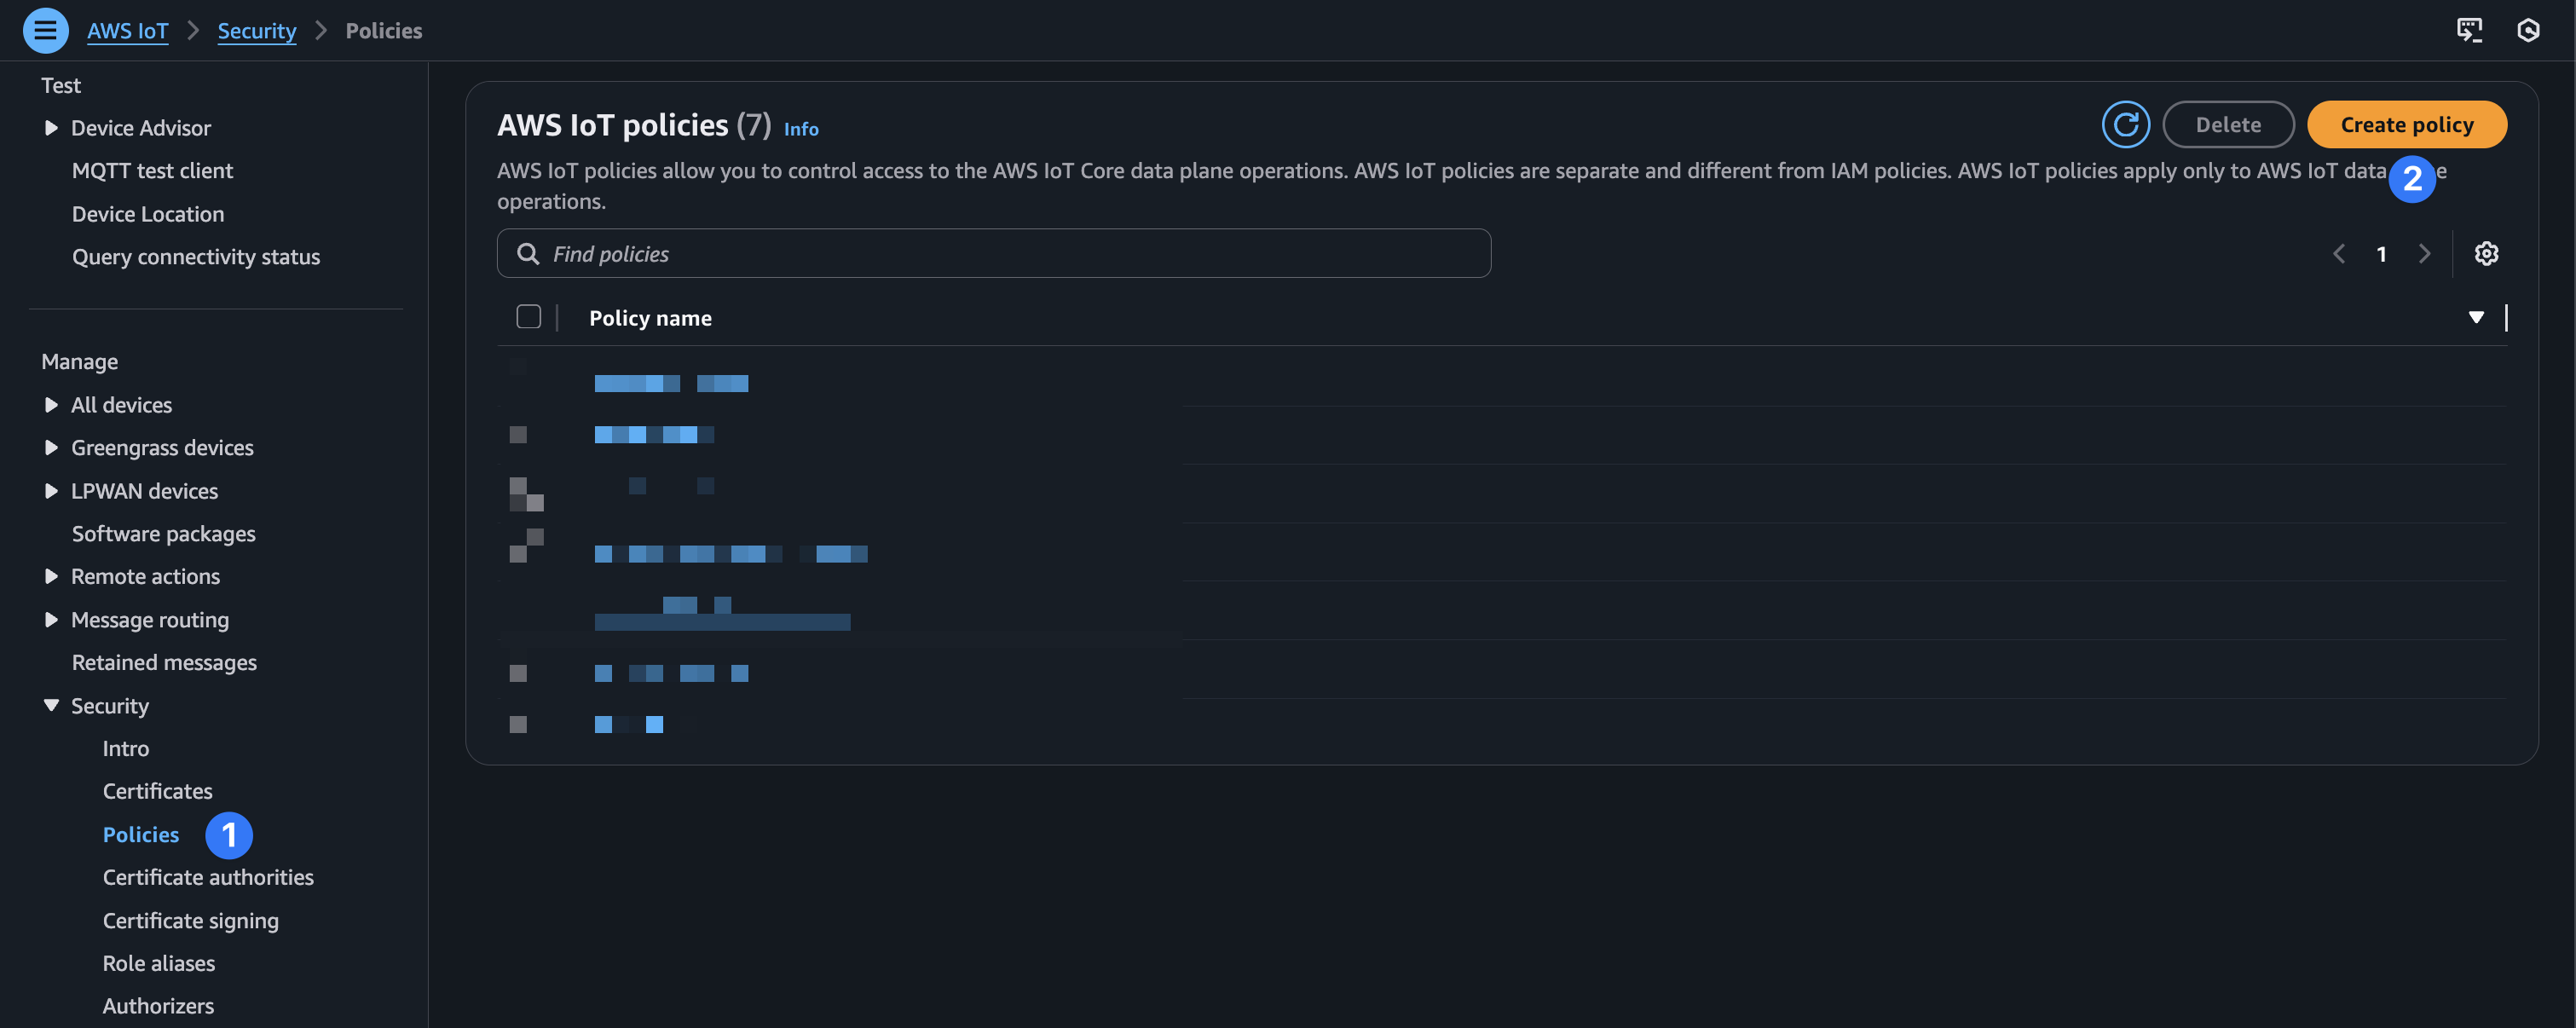
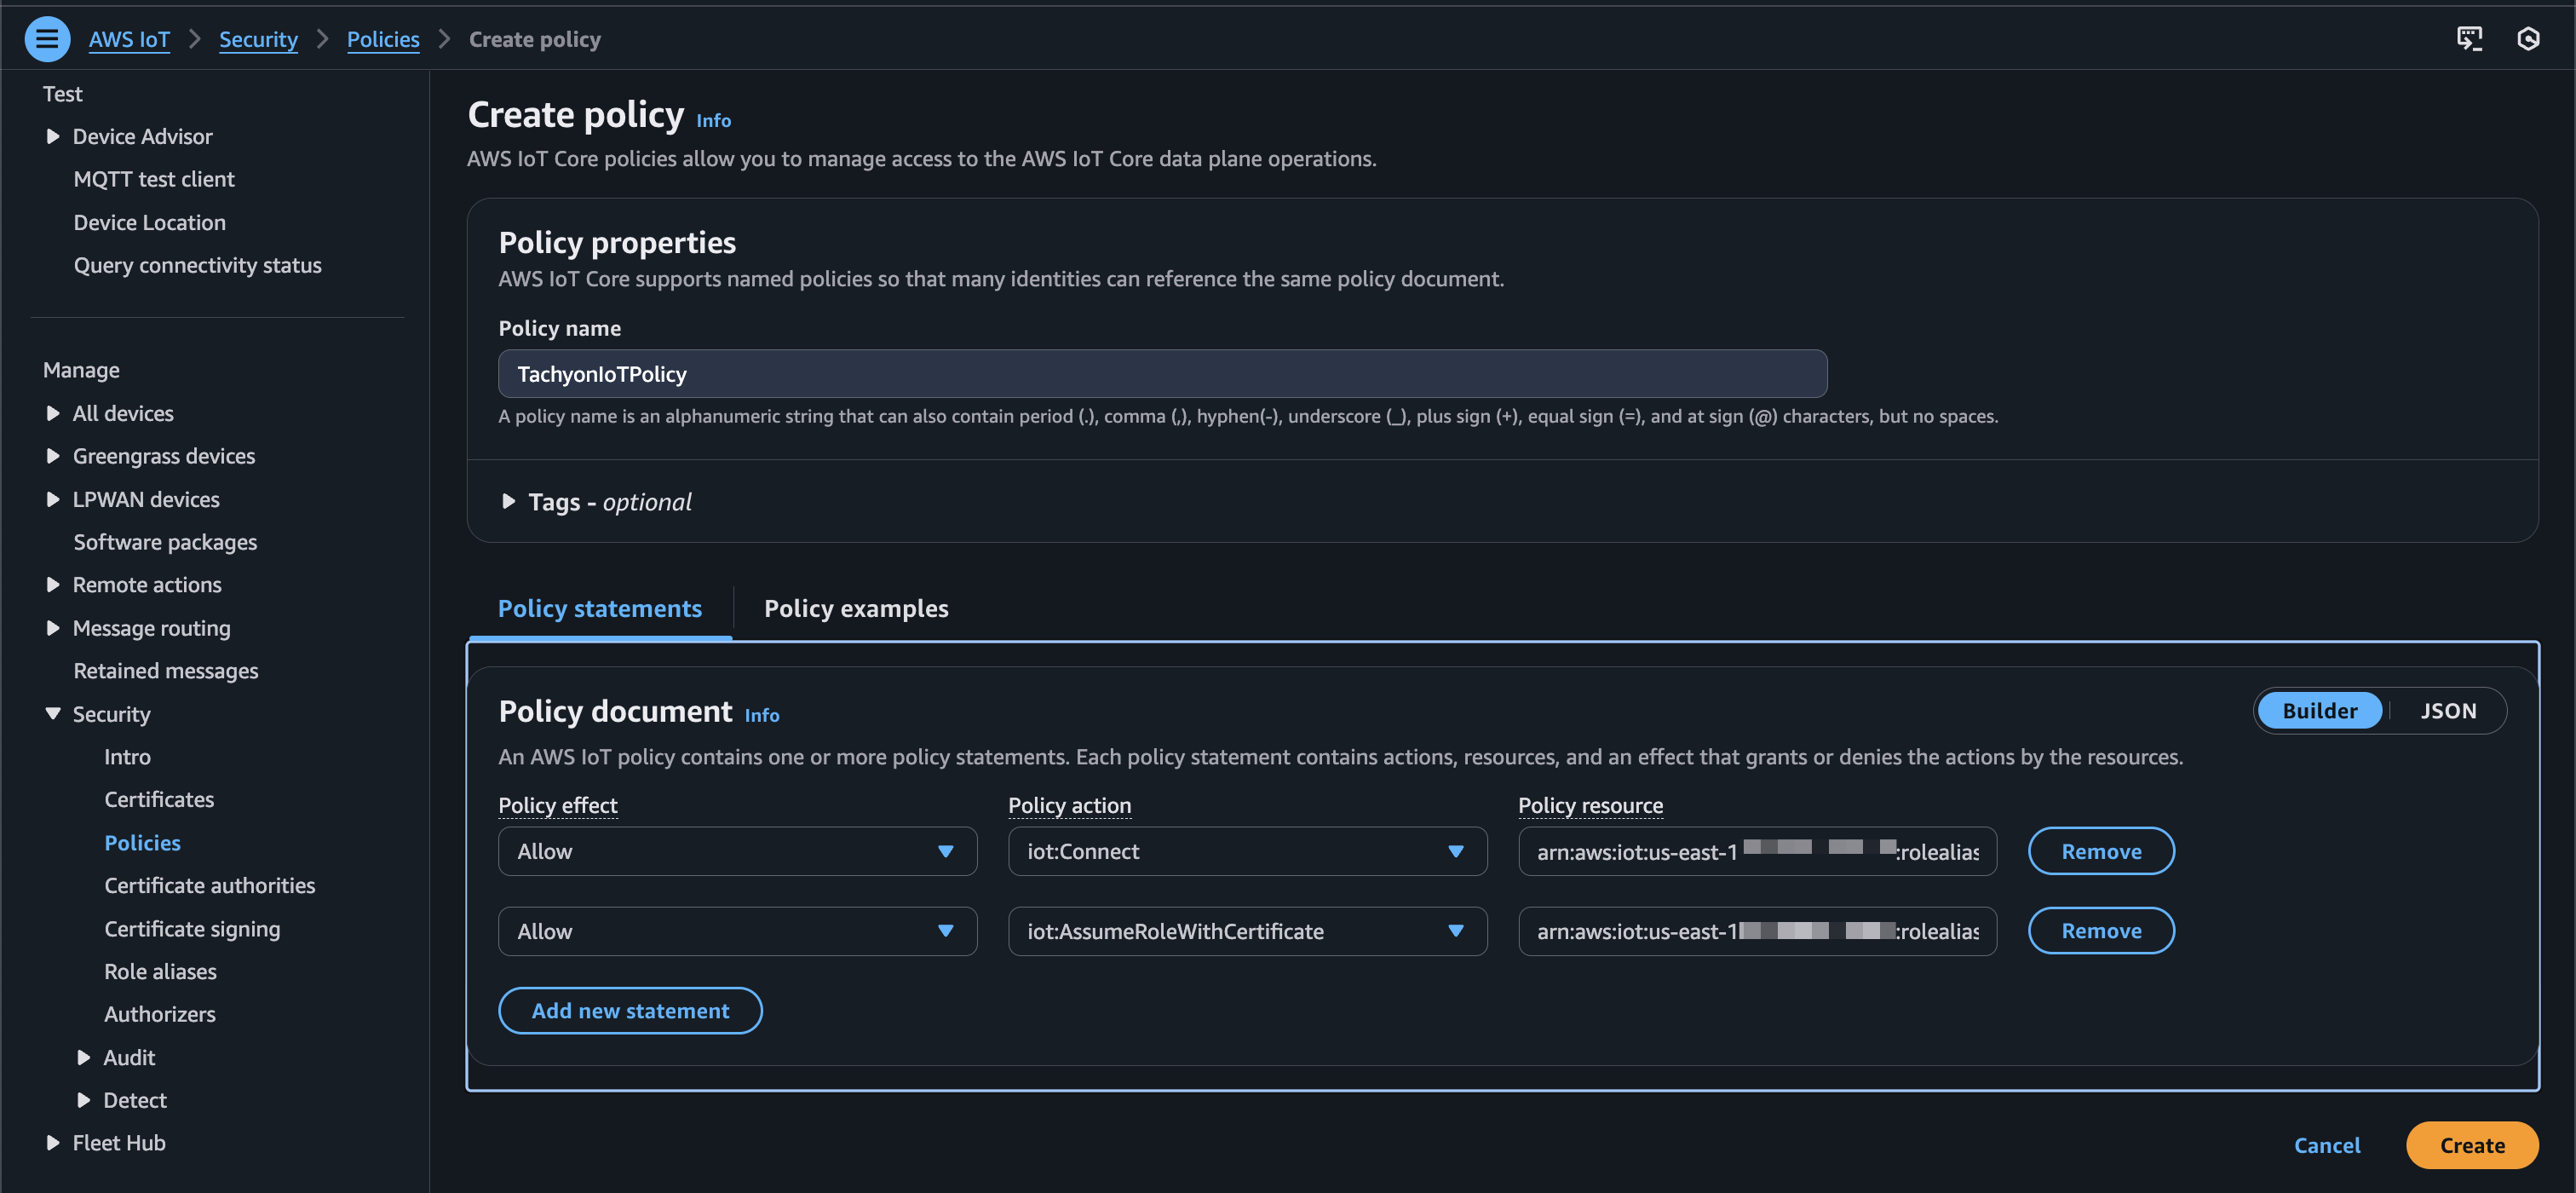
Give your new policy a name and configure the policy document as follows replacing role_alias_arn with the ARN value from the role alias step. Then select “Create.”
| Policy effect | Policy action | Policy resource |
|---|---|---|
| Allow | iot:Connect | <role_alias_arn> |
| Allow | iot:AssumeRoleWithCertificate | <role_alias_arn> |
Attach policy to thing
Now, while still in IoT Core, navigate to “All devices > Things” and click into the thing you created in the previous step. Then select the “Certificates” tab and click into the thing’s certificate.
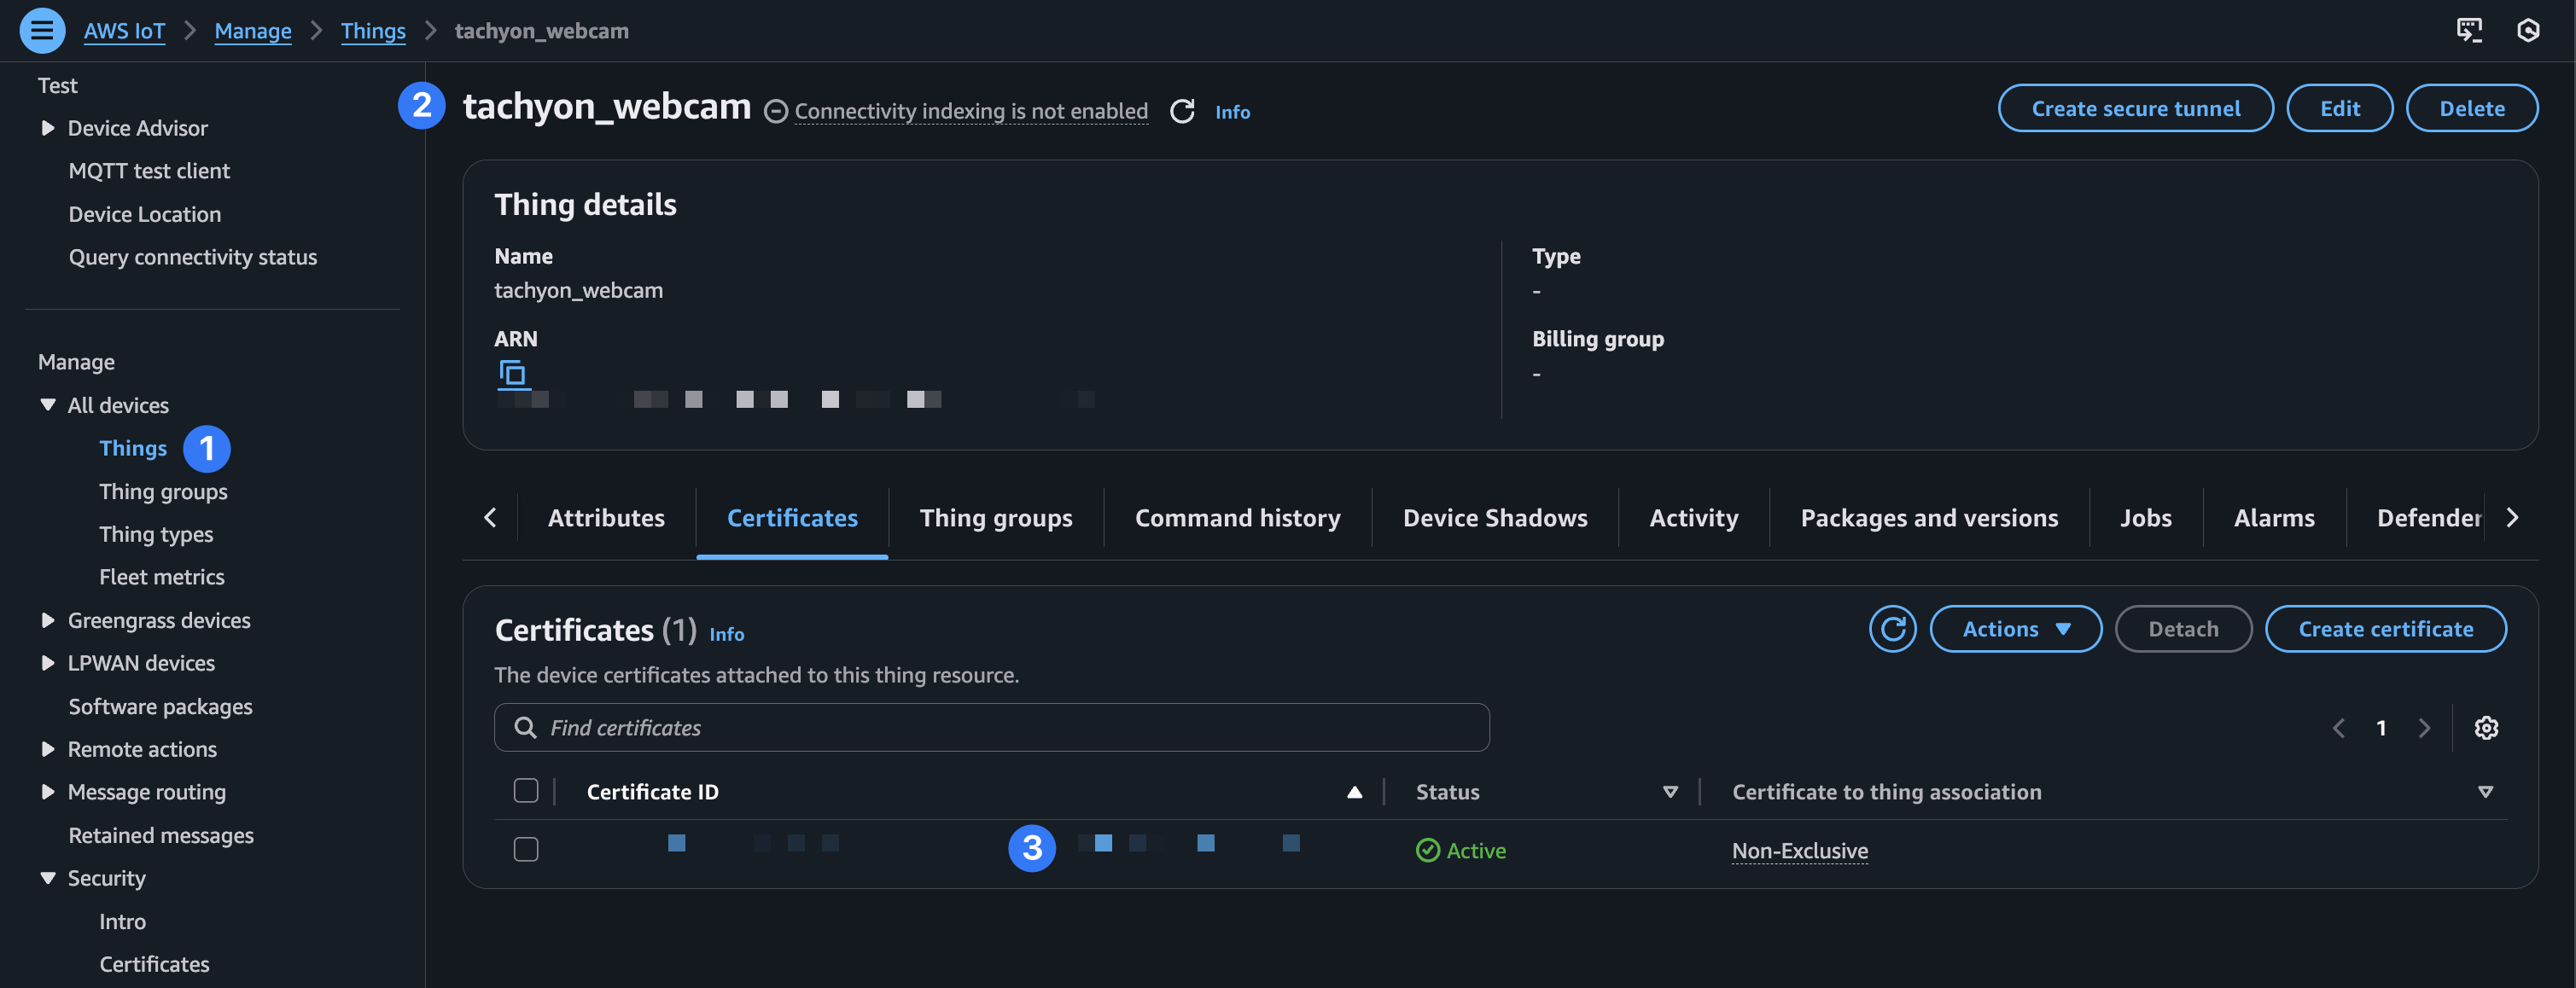
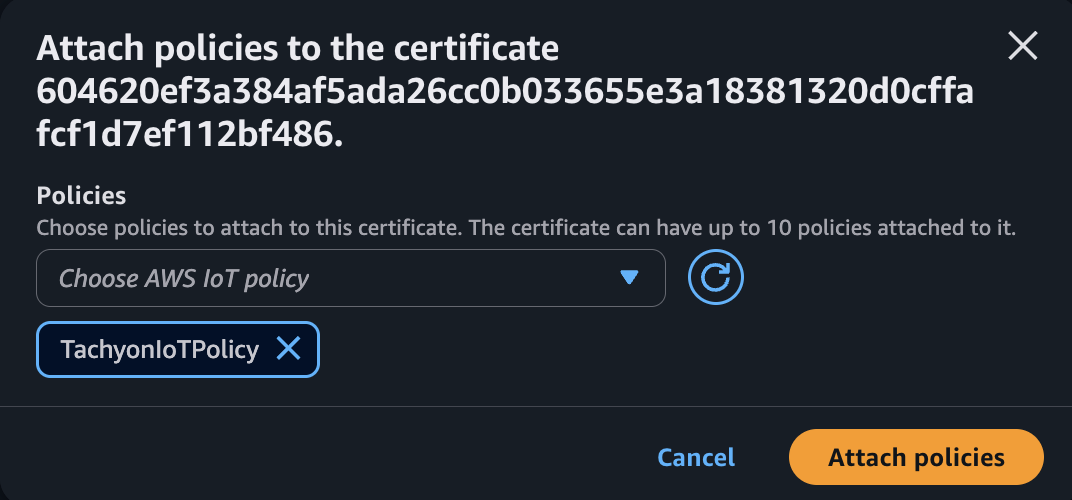
From there, choose “Attach policies.”
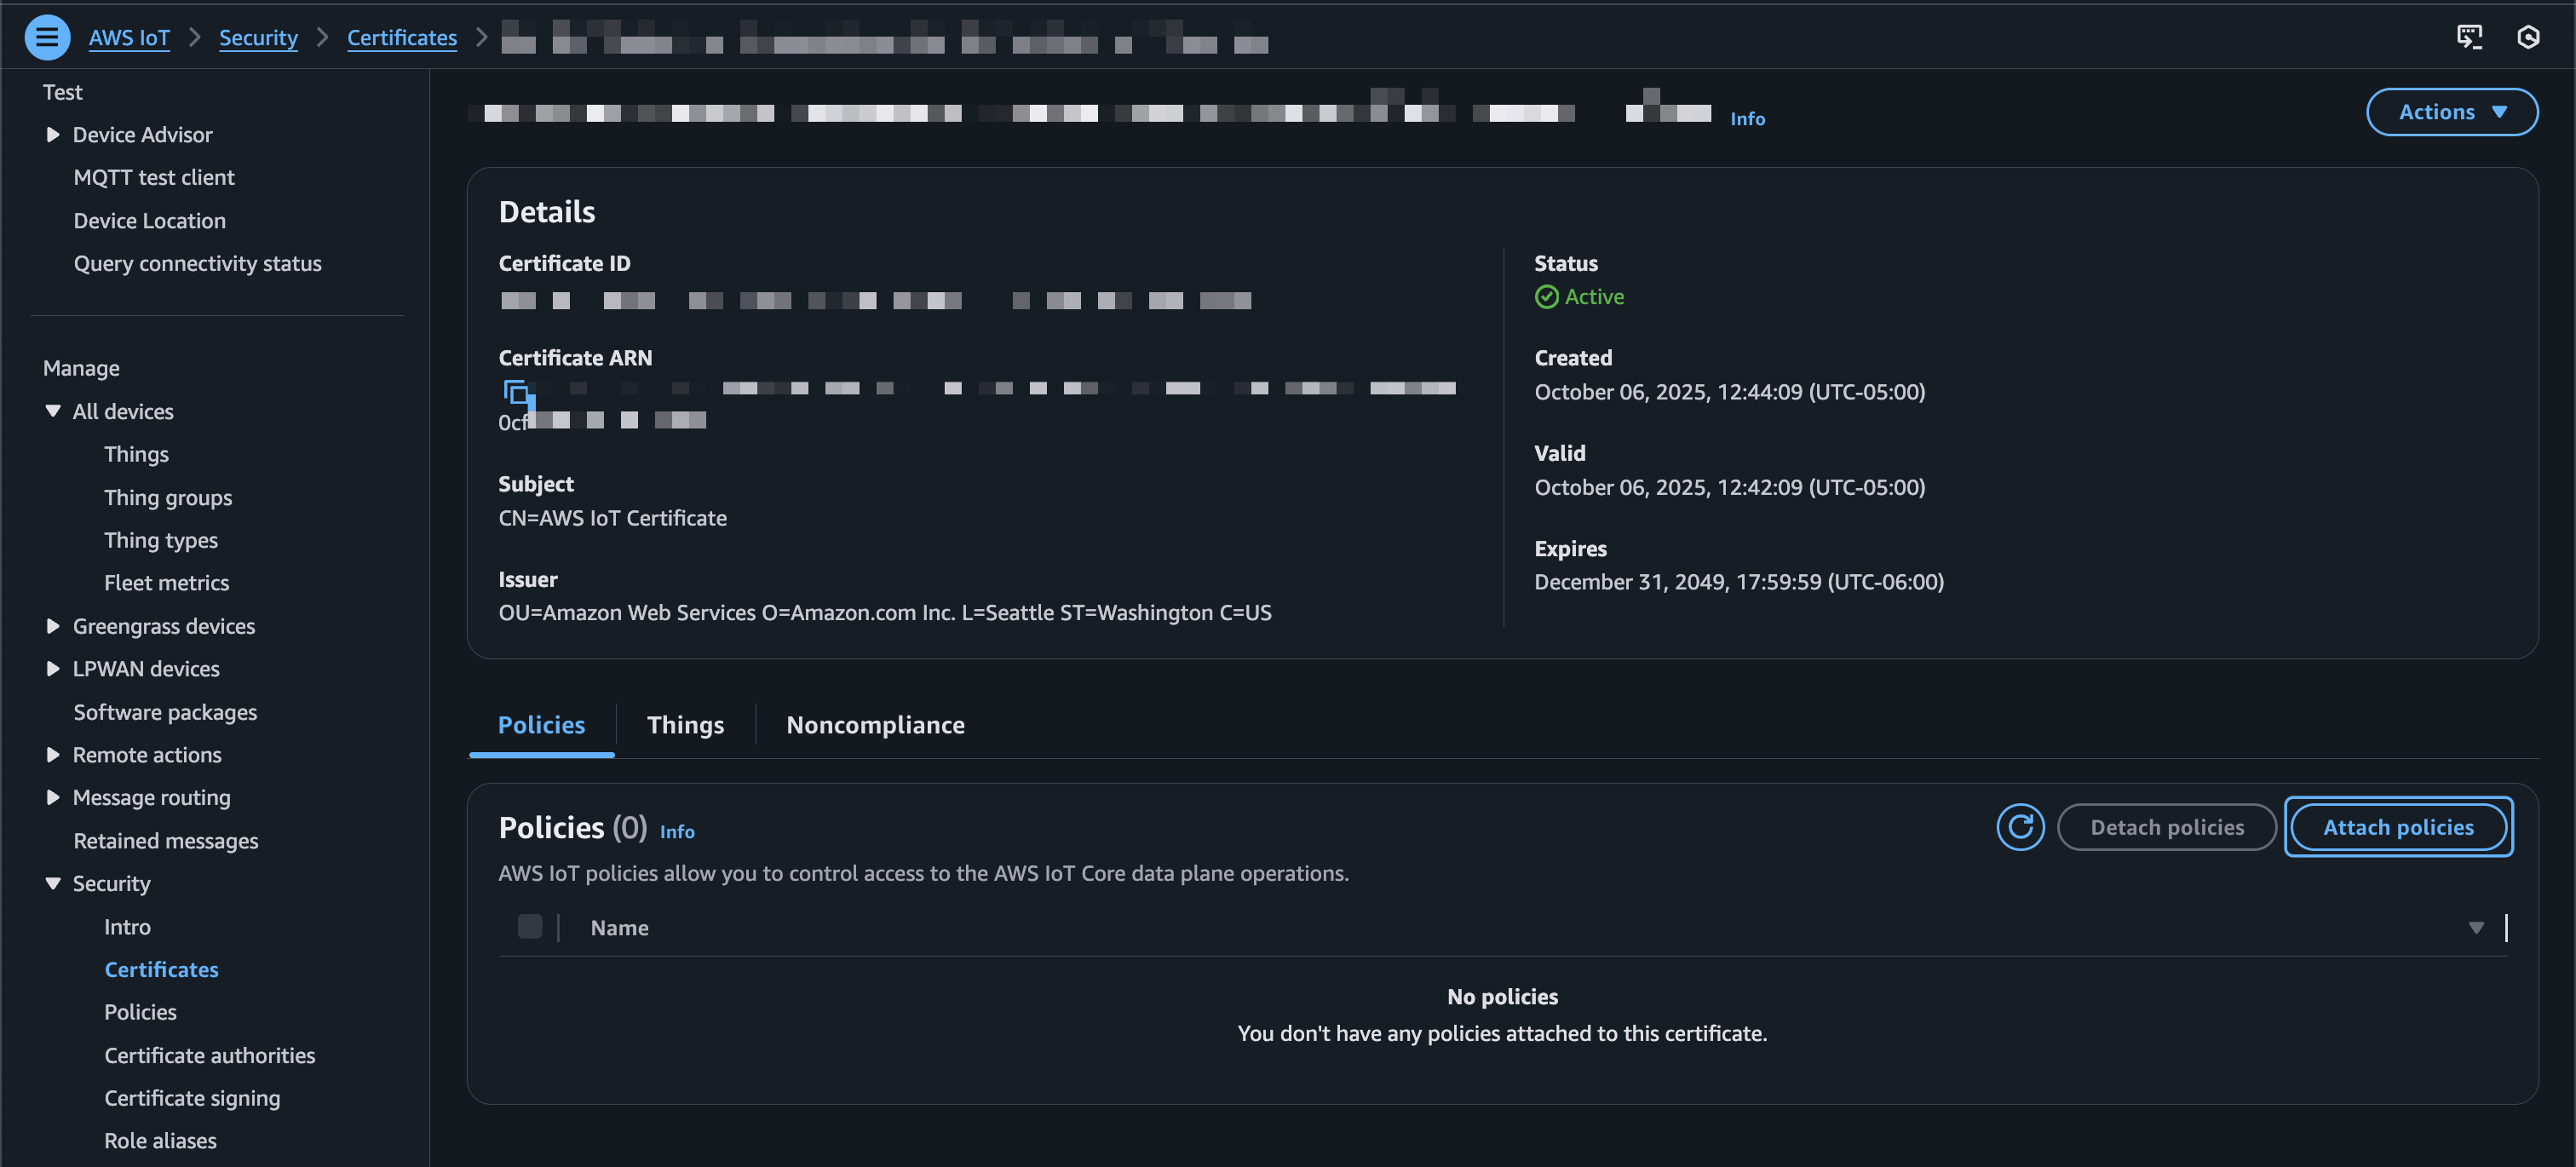
Select the certificate policy you created in the previous step.
center
Kinesis Video Stream
Finally, before we head over to programming our Tachyon, we’ll need to make a Kinesis Video Stream resource. In your AWS console, search for Kinesis Video Streams. Select “Video streams” and choose “Create video stream.”

The stream needs to have the same name as your AWS IoT “Thing.”
Select “Custom configuration” and modify the retention period, if you’d like.

Tachyon program
The remaining steps will assume you have a Tachyon configured and onboarded into your Particle account. For this example, you can choose either the desktop or the headless variant. Both should work in the same way.
Navigate to your device details page in your Particle console and open a new terminal connection.
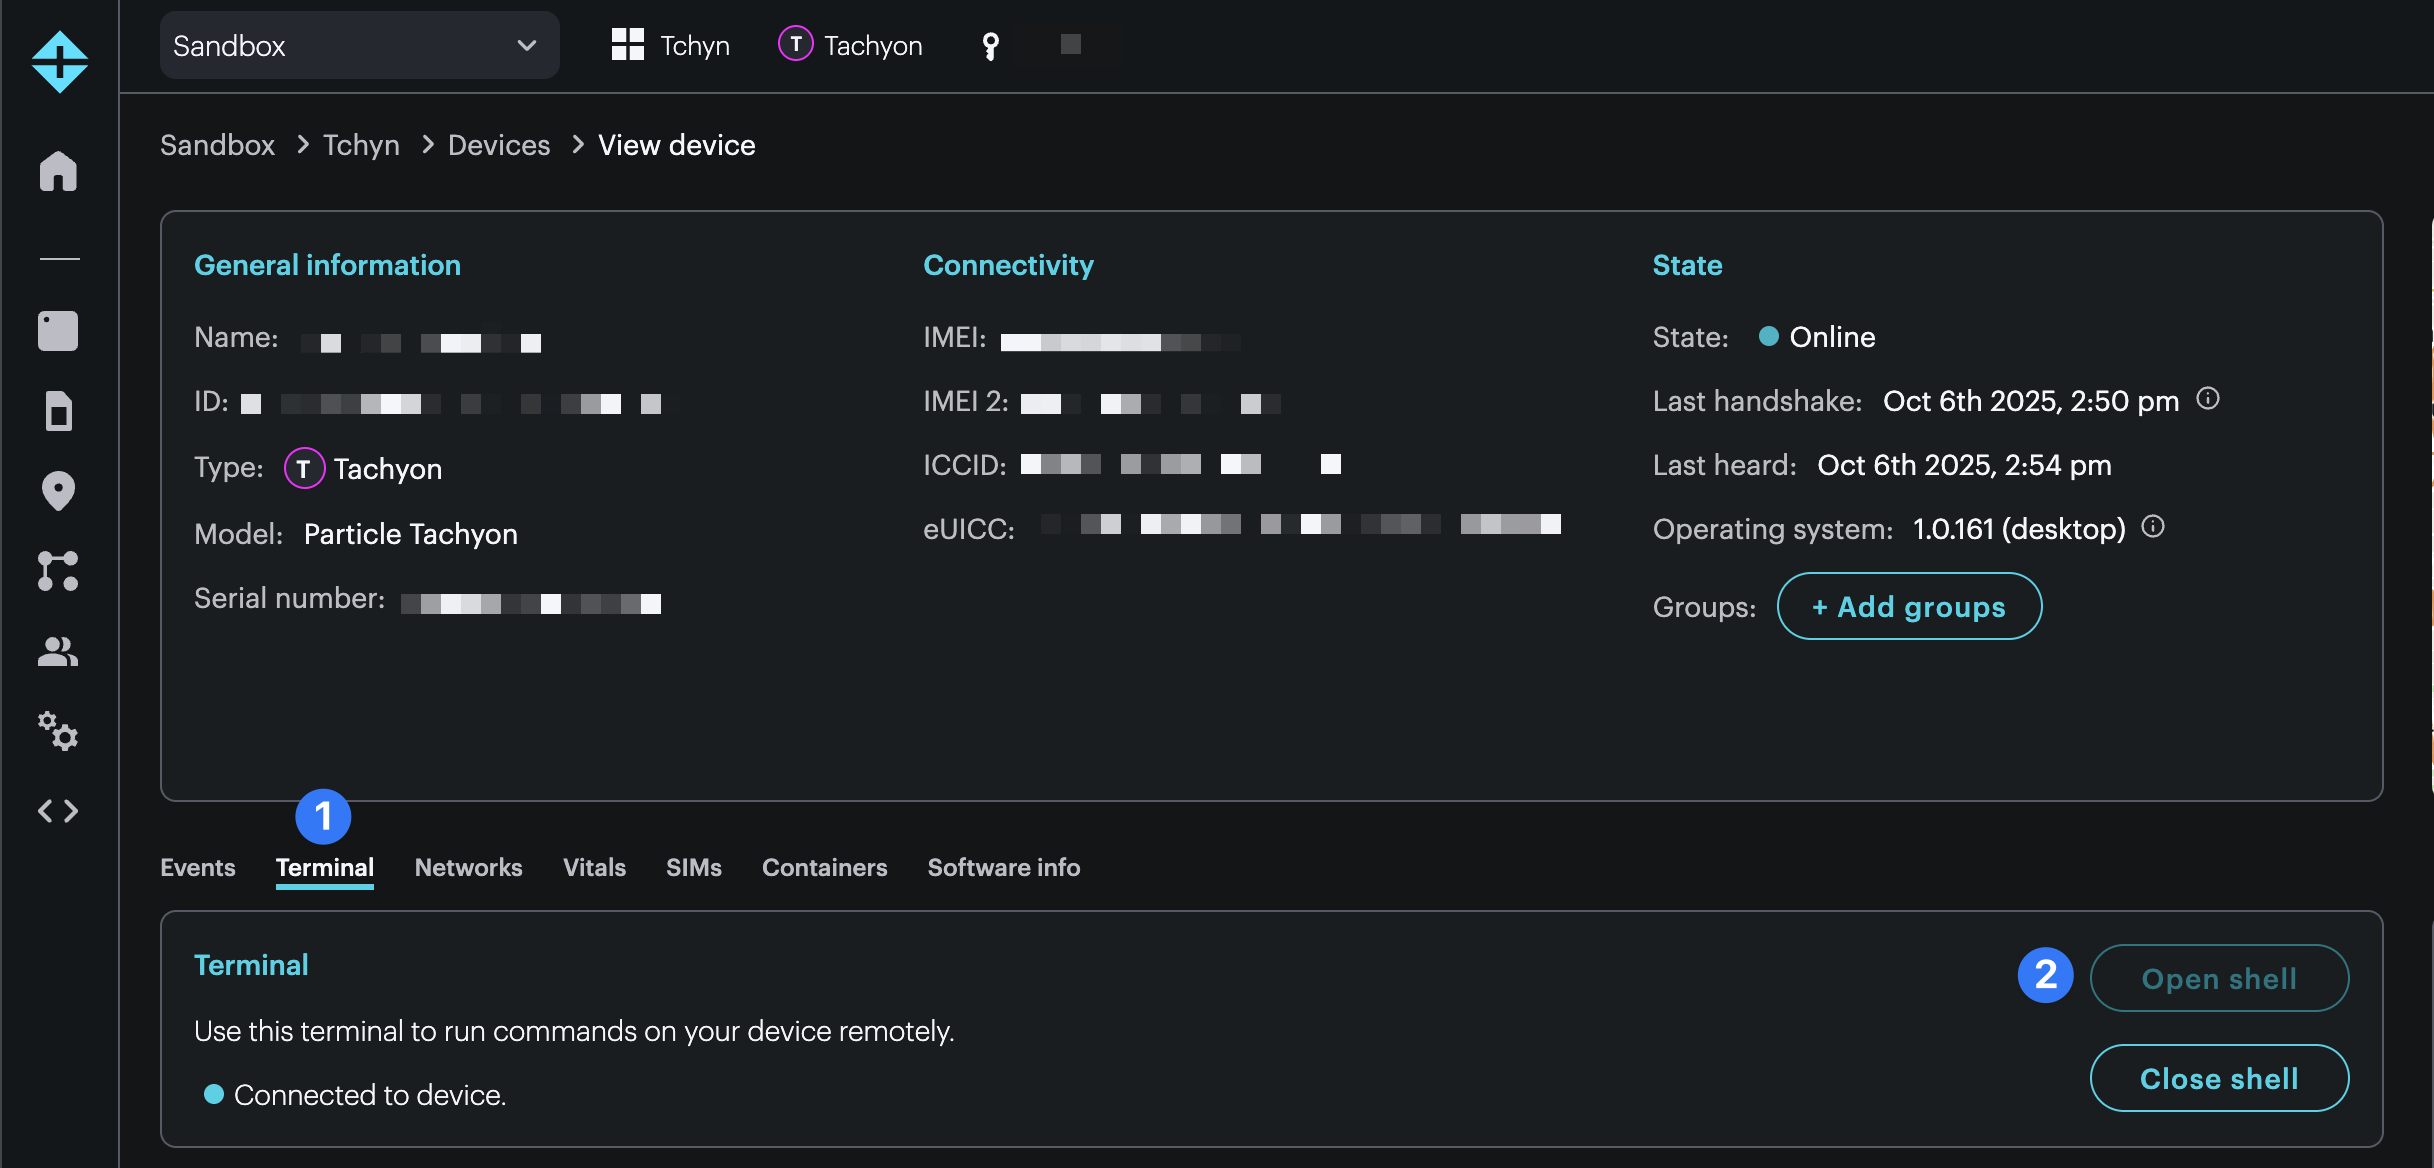
Log in to your user account by running the following command. The user is particle in this case.
sudo su particle
Next, clone the sample project’s repository to a directory of your choice. We’ll pull it into the ~/Documents/projects directory.
mkdir ~/Documents/projects
cd ~/Documents/projects
git clone https://github.com/epietrowicz/tachyon-kinesis-streamer.git
cd tachyon-kinesis-streamer
Now we’ll need to update our credentials. Navigate to kinesis-streamer/src/main.py and note the cert paths that we’ll need to fill in.
# Use absolute paths
BASE = os.path.abspath(os.path.join(os.path.dirname(__file__), ".."))
DEVICE_CERTIFICATE_PATH = os.path.join(BASE, "certs/device-certificate.pem.crt")
PRIVATE_KEY_PATH        = os.path.join(BASE, "certs/private-key.pem.key")
ROOT_CA_PATH            = os.path.join(BASE, "certs/root-ca.pem")
We’ll need to create a certs folder in the kinesis-streamer directory of our project with the certificate files we downloaded in the very first step.
Run the following commands to make the necessary certificate files.
cd ~/Documents/projects/tachyon-kinesis-streamer/kinesis-streamer
mkdir certs && cd certs
touch device-certificate.pem.crt
touch private-key.pem.key
touch root-ca.pem
Populate the files with the contents from the certificate files we downloaded earlier.
nano device-certificate.pem.crt
Paste the contents from <uuid>-certificate.pem.crt. Then ^ + O to save and ^ + X to exit.
Repeat this for the remaining files.
device-certificate.pem.crt=<uuid>-certificate.pem.crtprivate-key.pem.key=<uuid>-private.pem.keyroot-ca.pem=AmazonRootCA1.pem
Back in src/main.py we need to fill in a few remaining variables.
THING_NAME        = ""
STREAM_NAME = THING_NAME
AWS_REGION  = ""
IOT_CRED_ENDPOINT = ""
ROLE_ALIAS      = ""
| THING_NAME | The thing name you decided on in the first step. tachyon_webcam in this case. |
| AWS_REGION | The region you’ve been working in. us-east-1 in this case. |
| ROLE_ALIAS | The name of the role alias you created in the role alias step. TachyonIoTRoleAlias in this case. |
| IOT_CRED_ENDPOINT | Explained in the next step… |
To get the IOT_CRED_ENDPOINT value, we’ll need to navigate back to the AWS console. Search for the Cloud Shell service, open it, and run the following command:
aws iot describe-endpoint --endpoint-type iot:CredentialProvider

Copy this value into the IOT_CRED_ENDPOINT variable of src/main.py.
Running the container
Now run the container with the following command:
particle container run
You may have to add the Particle CLI to your system path. It can be found at ~/bin/particle. To install the Particle CLI, you can find the instructions in the Particle documentation.
Once the program starts successfully, you’ll be greeted with a stream of log output indicating stream activity.
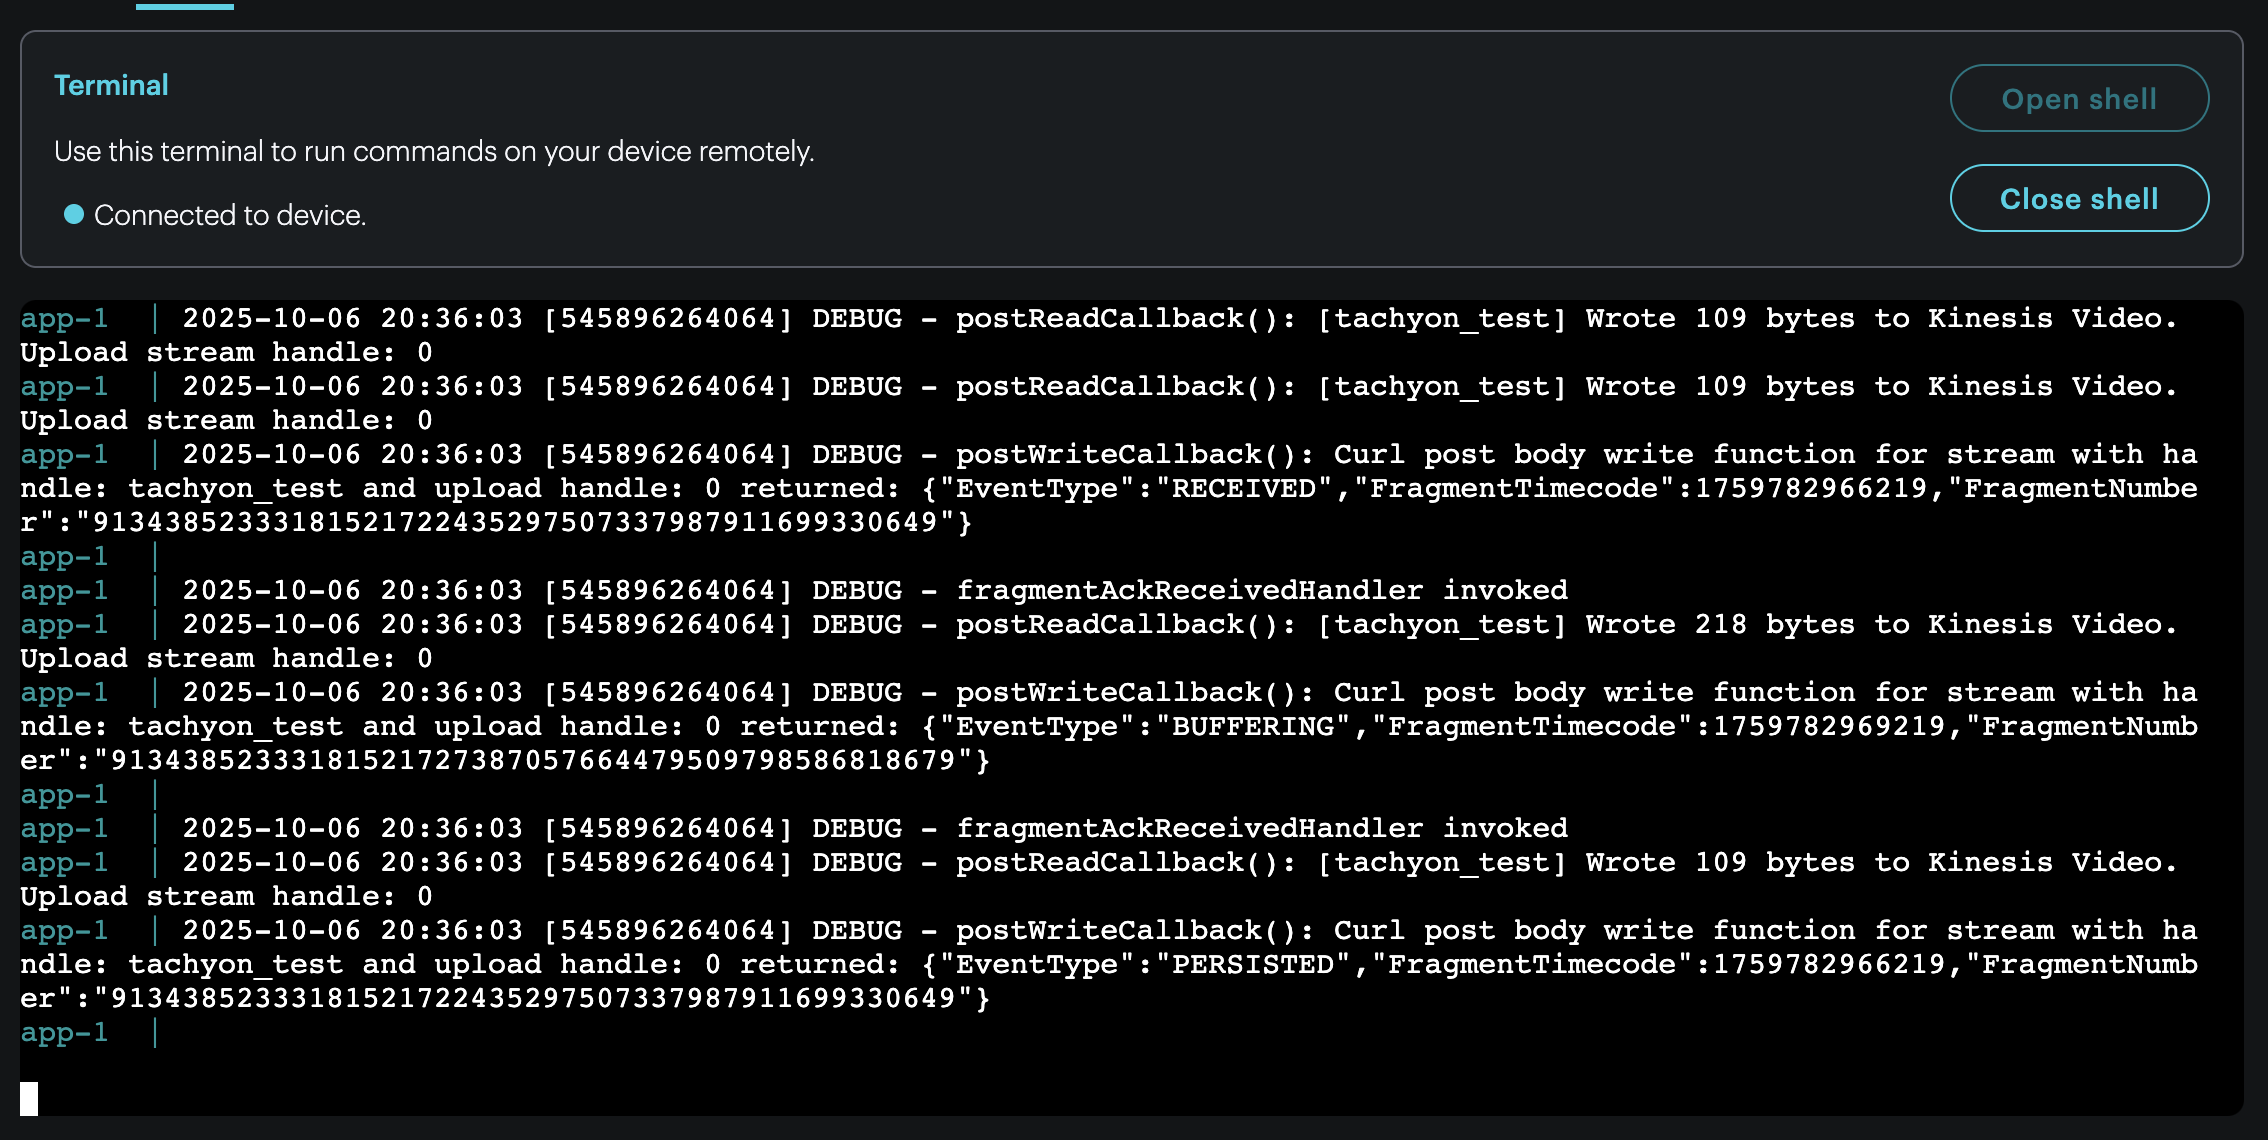
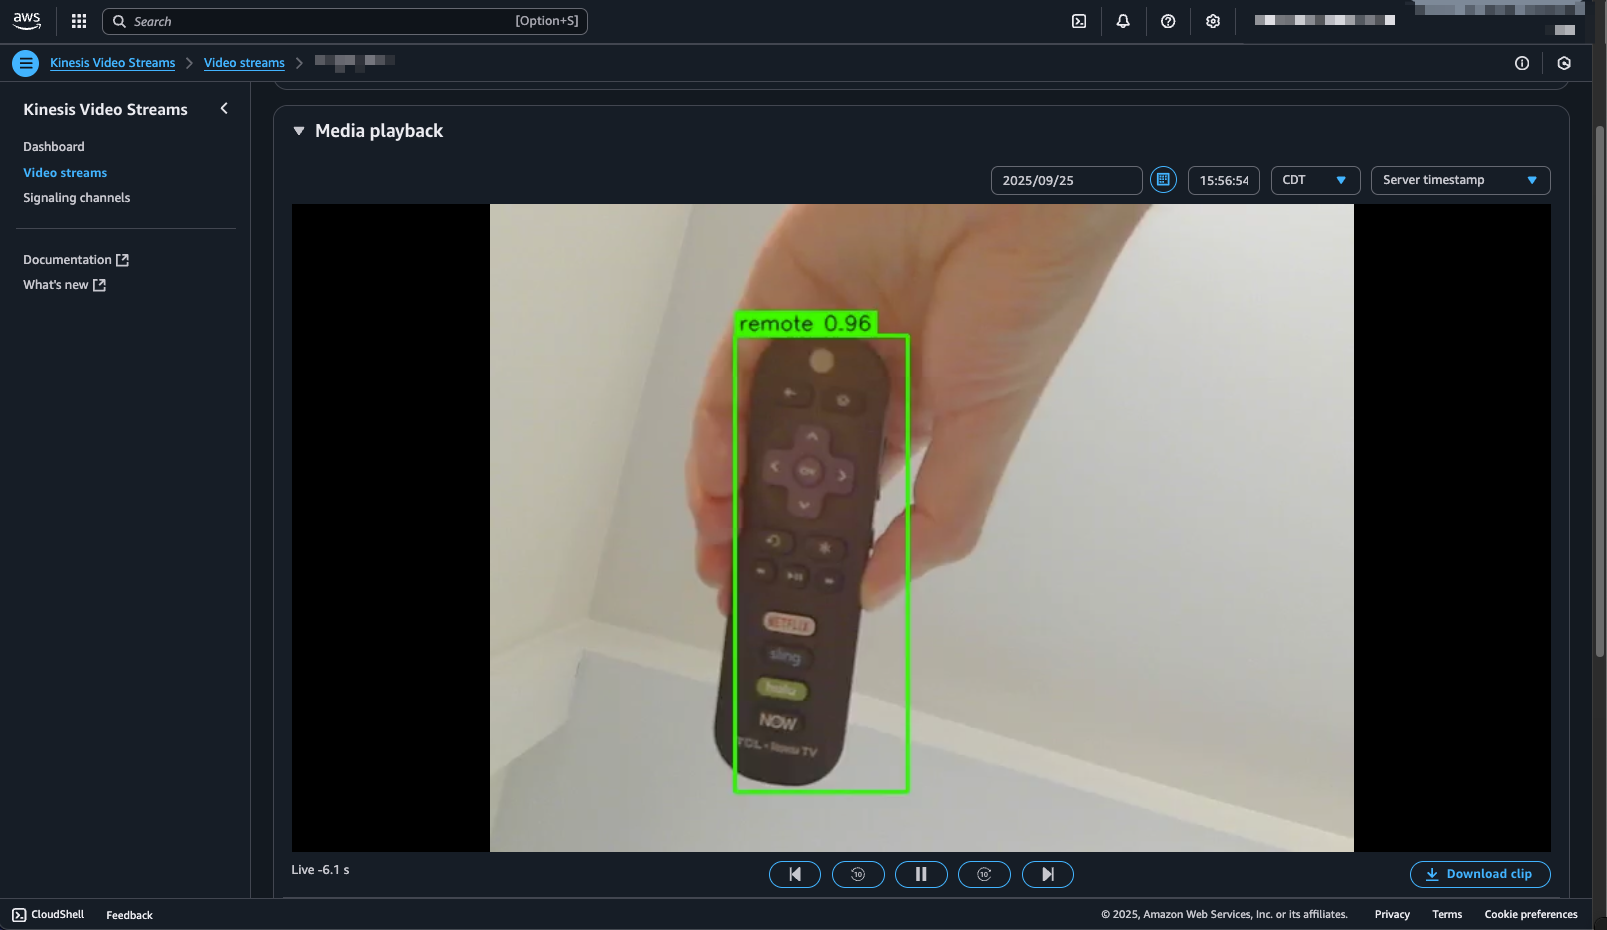
To view the stream, navigate back to the AWS Kinesis Video Stream console and click into the newly created stream.

Expand “Media playback” to view the live feed with YOLOv8 inferencing baked in!
Conclusion
This post shows how you might configure an AWS Kinesis Video Stream for your Tachyon device. There are a few different ways to go about this. But, once up and running, you’ll have an AI-annotated video feed with long-lasting retention that can be deployed just about anywhere.
Ready to get started?
Order your Tachyon from the store.
